
Automate Triggers process Salesforce records in near real time. When a record is created or updated in Salesforce, a trigger runs the action you configured — detecting duplicate records, transforming field values, verifying contact information, or enriching data — immediately.
Good to Know: Triggers are based on the Salesforce Change Data Capture API. Considerations for CDC can be found here
General Considerations | Change Data Capture Developer Guide | Salesforce Developer
Default Change Event Allocations | Change Data Capture Developer Guide | Salesforce Developers
Accessing Triggers
Navigate to the Triggers menu item under the Automate module.
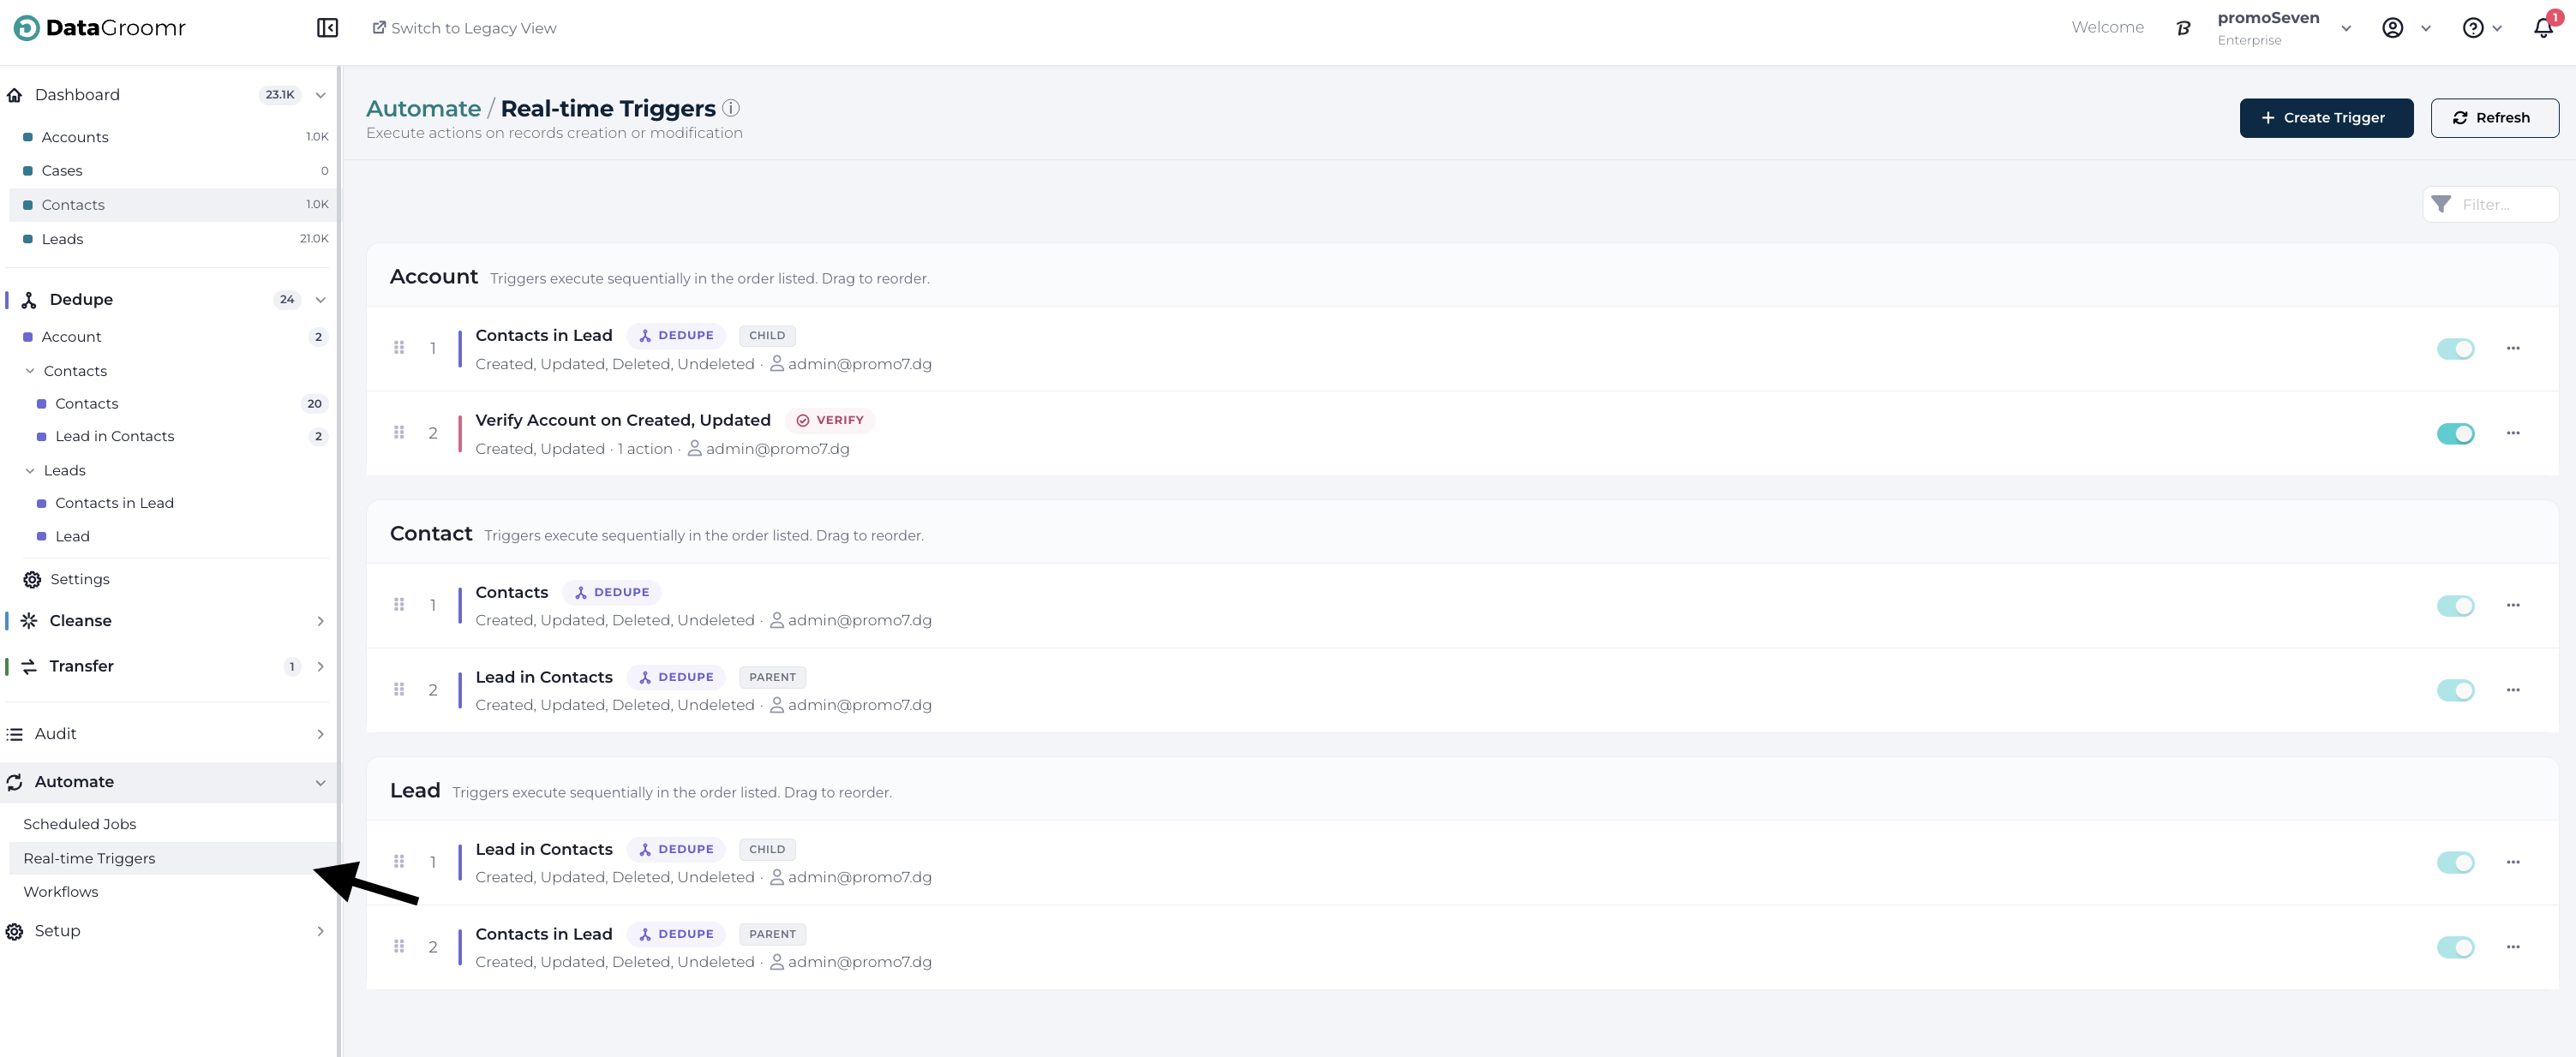
The Triggers Page
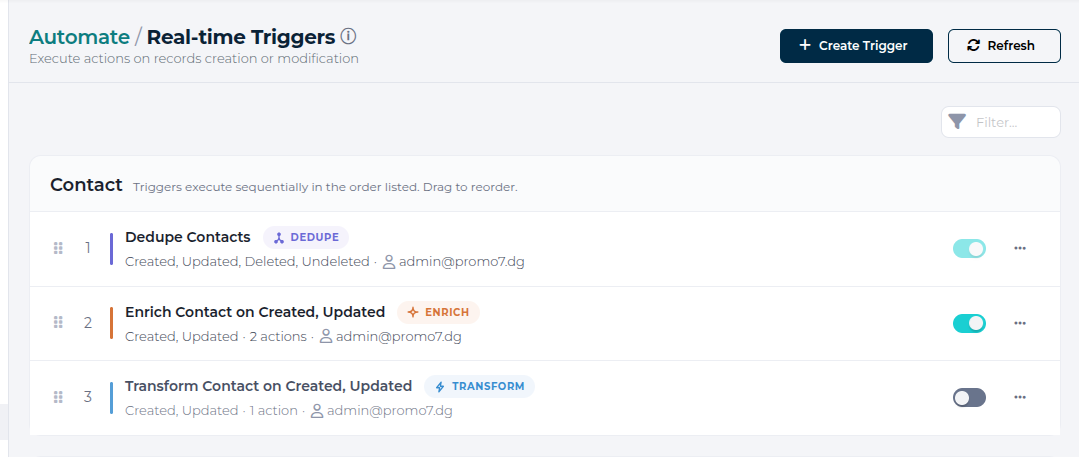
Triggers are grouped by Salesforce object. Each object with at least one trigger has its own collapsible group, with a header showing the object name and icon, the number of triggers, and the event types they react to. Groups are sorted alphabetically. Each trigger row shows its order number within the group, its owner, its event types, and an enable/disable toggle.
Adding a New Trigger
Hit the Add Trigger button and a dialog window will appear. Each trigger performs exactly one action — select the action type, then specify the Salesforce object and the events the trigger should fire on (Record Created and/or Record Updated):
- Dedupe — detect duplicate records in real time as records are created or updated.
- Transform — standardize, normalize, or update field values in real time.
- Verify — validate email, phone, or address fields in real time.
- Enrich — enrich records with data from your connected intelligence providers in real time. Requires a Pro or higher subscription with Enrichment enabled for your organization.
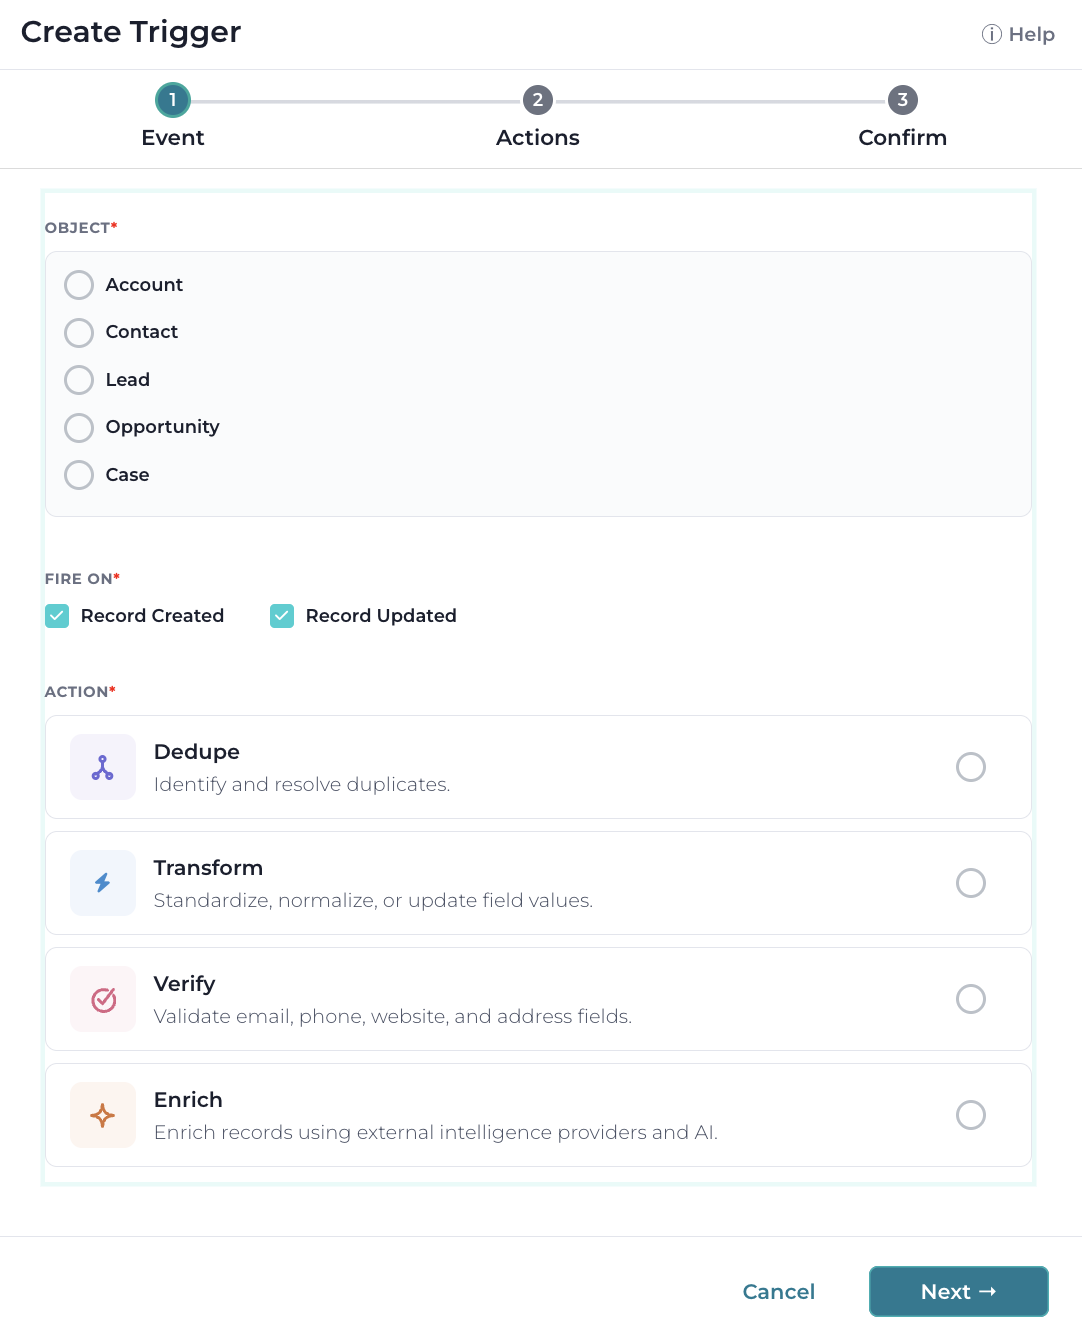
Note: A workflow that needs to both transform and verify records is simply two triggers — create one trigger per action and order them in the list. A trigger that previously performed both actions appears as two separate triggers, suffixed (Transform) and (Verify), with the transform running first.
Configuring the Action
The second step shows the configuration for the selected action:
- Dedupe — select the datasets of the chosen object and a classic matching model; the settings match the dataset’s Live Dedupe tab.
- Transform — select the fields and transform rules to apply, similar to Cleanse dataset configuration.
- Verify — select the fields to verify, similar to Cleanse dataset configuration.
- Enrich — select the enrichment actions to run; the setup mirrors verification.
Learn more: Configuring Cleanse Datasets
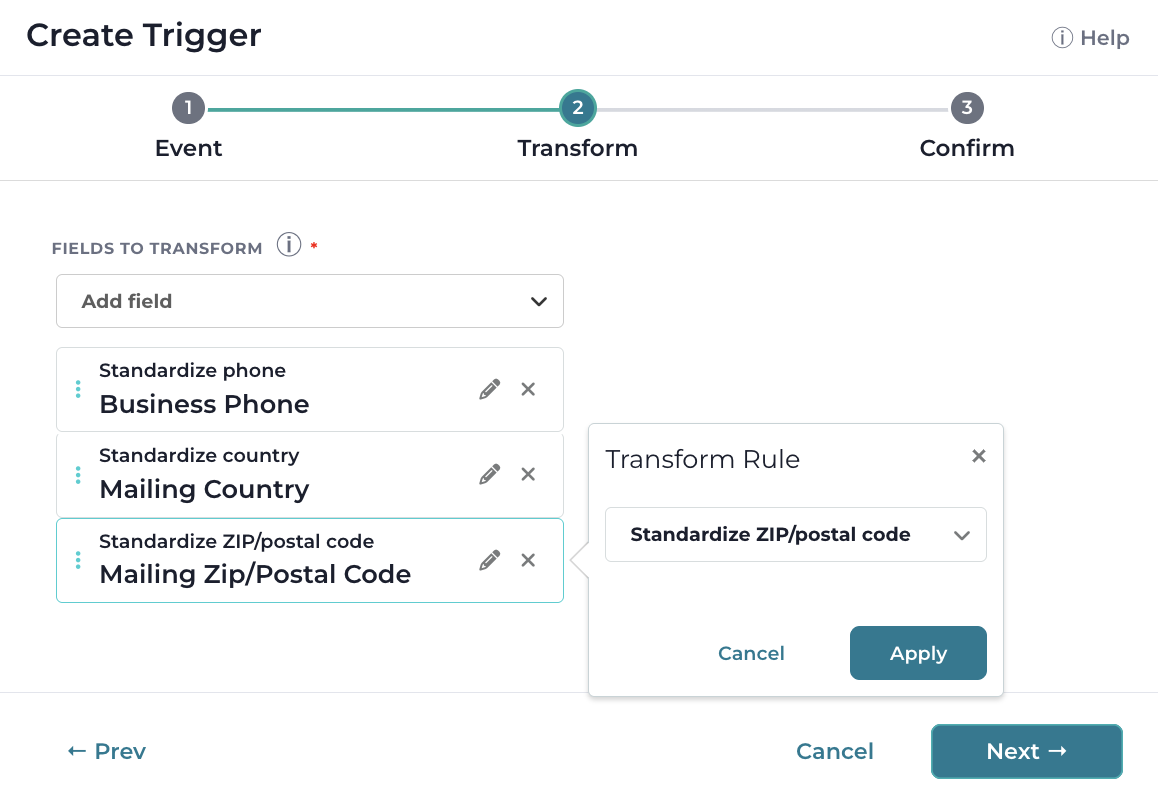
If the field has been configured to synchronize back to Salesforce, a green icon will appear next to the field name indicating that the verification status will be synchronized. More about Verifications can be found here.
Hit Next to advance to the Confirm step — it shows the trigger summary with its action badge. Hit Confirm to create the trigger.
Good to Know: Triggers can be configured to bypass Salesforce Duplicate Rules, streamlining business logic and processes.
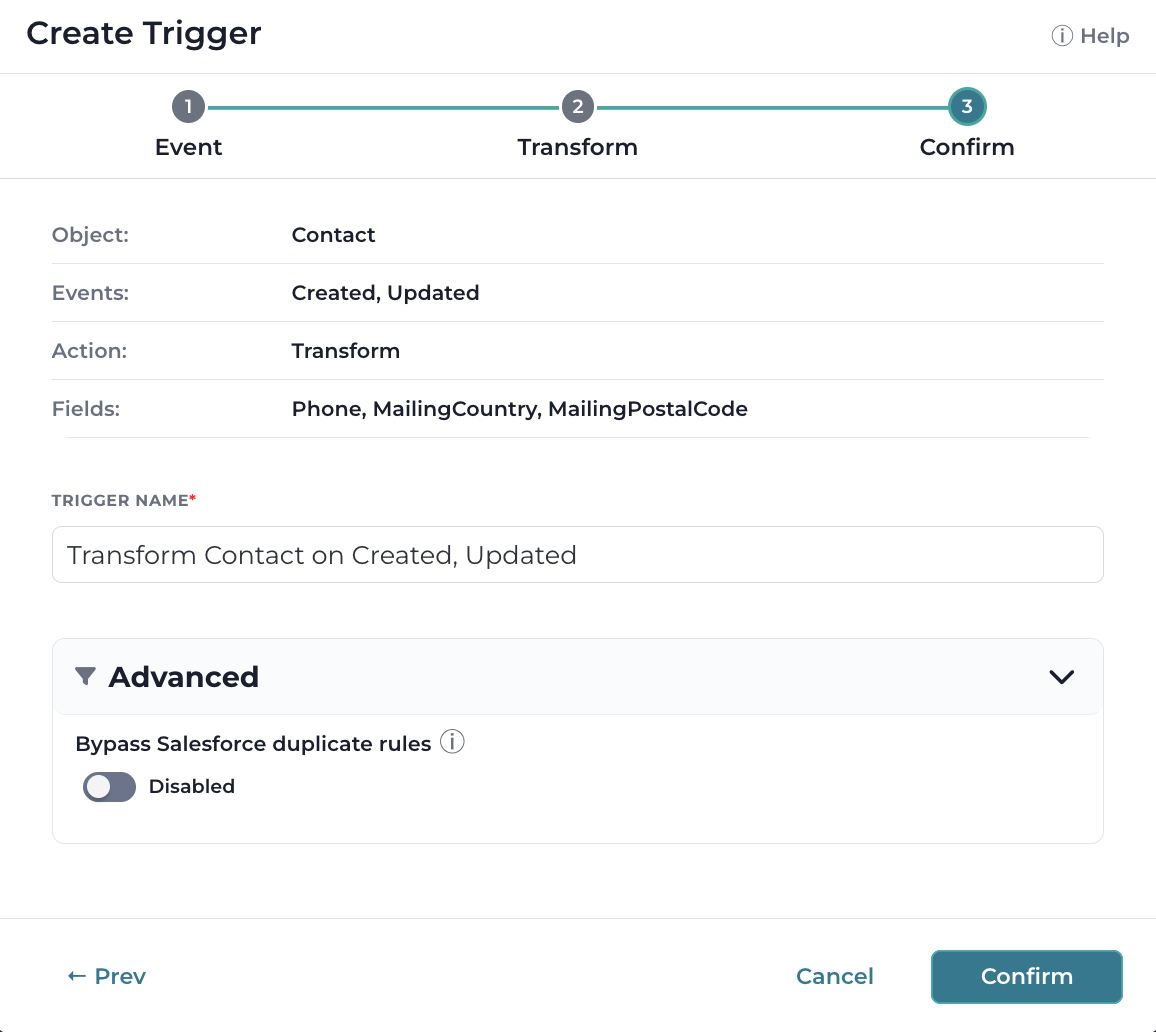
The trigger name is auto-generated and shown at the bottom of the dialog — adjust it if needed. Hit Next to advance to the next step.
Live Dedupe in the Triggers View
When Live Dedupe is enabled on a Dedupe dataset (its Live Dedupe tab), it automatically appears as a trigger entry under its object group, marked with a purple Live Dedupe badge and an Auto label, reacting to record create, update, delete, and undelete events.
- Clicking the entry opens the dataset’s Live Dedupe configuration tab.
- New Live Dedupe entries are placed at the start of their object group by default.
The dataset’s Live Dedupe tab also shows where the trigger falls in the object’s execution sequence (“This trigger runs as step N of M”), with a link back to the Triggers view.
Learn more: Live Dedupe: Deduplication in real-time
Execution Order
When multiple triggers are configured on the same Salesforce object, they are processed sequentially in the order they appear on the Triggers page. This guarantees a deterministic outcome when more than one trigger reacts to the same record change.
- Triggers within an object group execute top-to-bottom based on their configured order.
- A trigger whose event type does not match the incoming event (for example, an “On Update”-only trigger when the event is “Record Created”) is skipped, and execution continues with the next trigger.
- Disabled triggers are skipped entirely.
- If a trigger fails, the pipeline continues with the next trigger in the sequence. The failure is logged in the Audit Log Browser with the error details.
- Successful runs are logged in the Audit Log Browser with step-by-step timing per trigger.
- A second change event on the same record waits for the active pipeline to complete before its own pipeline starts.
To change the order, drag a trigger up or down within its object group using the drag handle on the left of the row. Order numbers update as you drag, and the new order is saved immediately — it applies on the next incoming change event. Triggers cannot be dragged between object groups, since each object is an independent execution pipeline.
Prompts Execution Order in Trigger
For triggers that include Enrichment actions, the prompts assigned to the trigger execute top-to-bottom following the same order configured on the Cleanse dataset. Later prompts can consume field values written by earlier prompts in the same trigger run.
Managing Triggers
The following functions are available from the Triggers page:
- Edit trigger
- Toggle (disable or enable) trigger
- Delete trigger
- Drag to reorder triggers within an object group