
Workflows: Multi-Step Automation Pipelines
Automate Workflows chain multiple data-quality actions into a single automated pipeline. Each step runs in order, top to bottom, on a single schedule — for example: analyze a dataset, merge duplicates, then verify emails, all in one run.
Good to Know: Workflows are available on the Enterprise plan. Users on other plans will see an upgrade prompt when creating a workflow.
Workflows vs. Jobs and Triggers
Workflows is one of three automation tools in the Automate module:
- Scheduled Jobs run a single action on a schedule.
- Real-time Triggers react to Salesforce record changes as they happen.
- Workflows chain multiple actions into one ordered pipeline governed by a single schedule.
Accessing Workflows
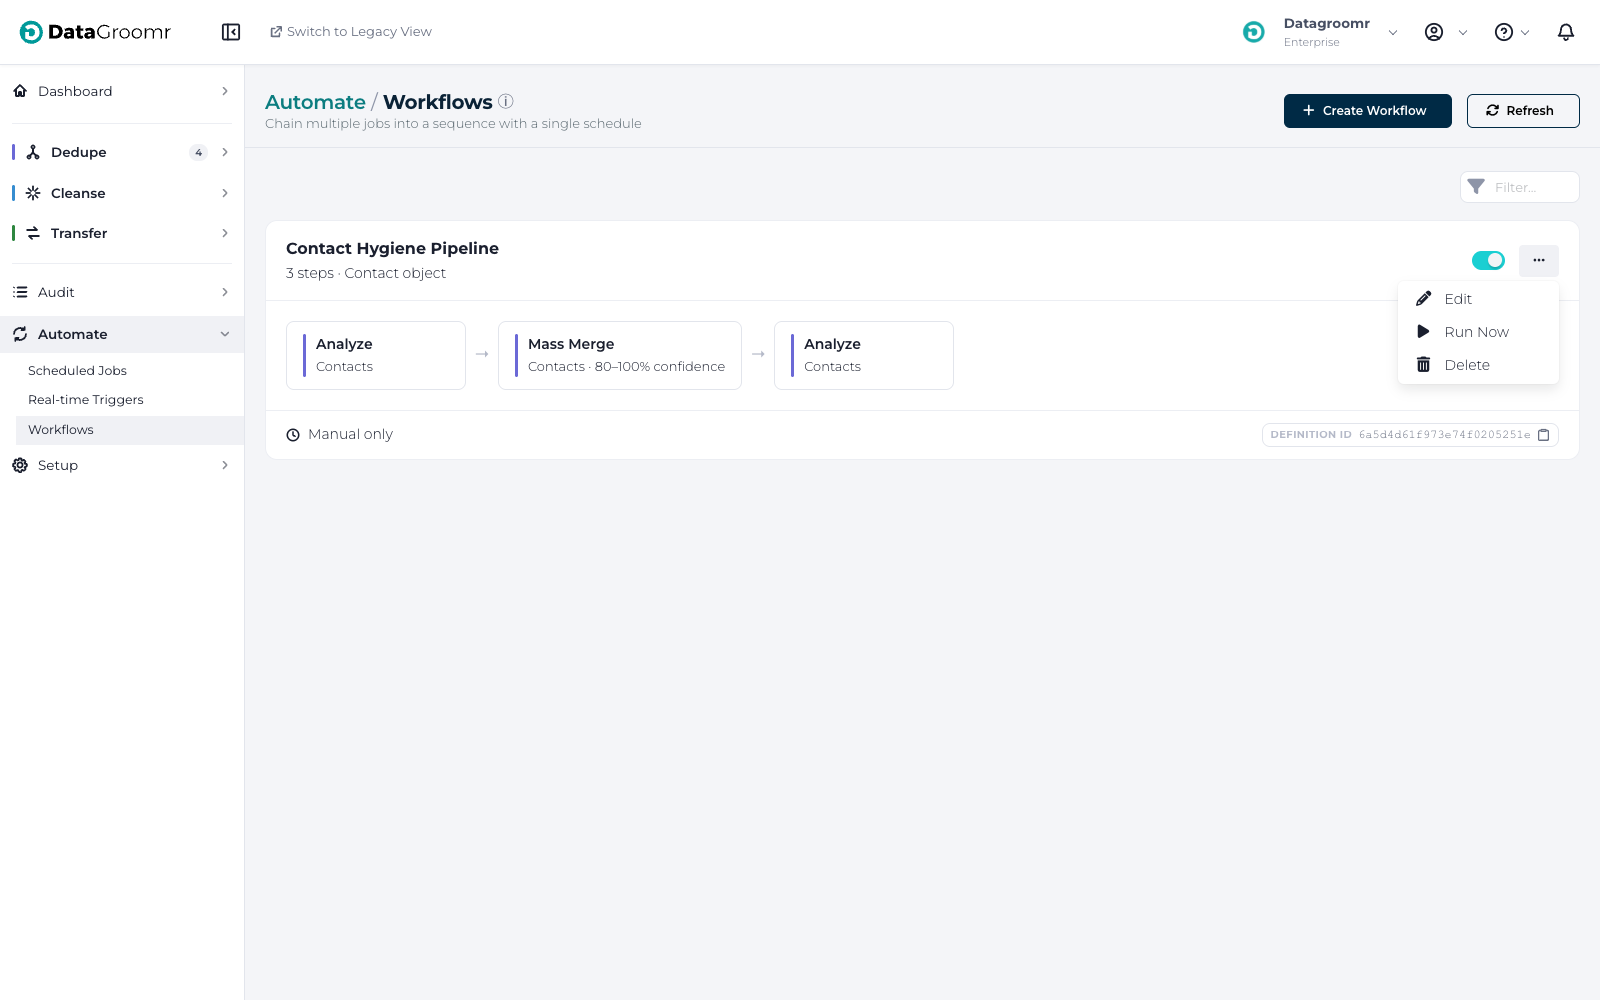
Navigate to the Workflows menu item under the Automate module, or open the Workflows card on the Automate dashboard.
Creating a Workflow
Hit the Create Workflow button. A dialog window will appear with a three-step wizard: Steps, Schedule, and Confirm. Use Next and Prev to move between the wizard steps.
Step 1: Add Steps
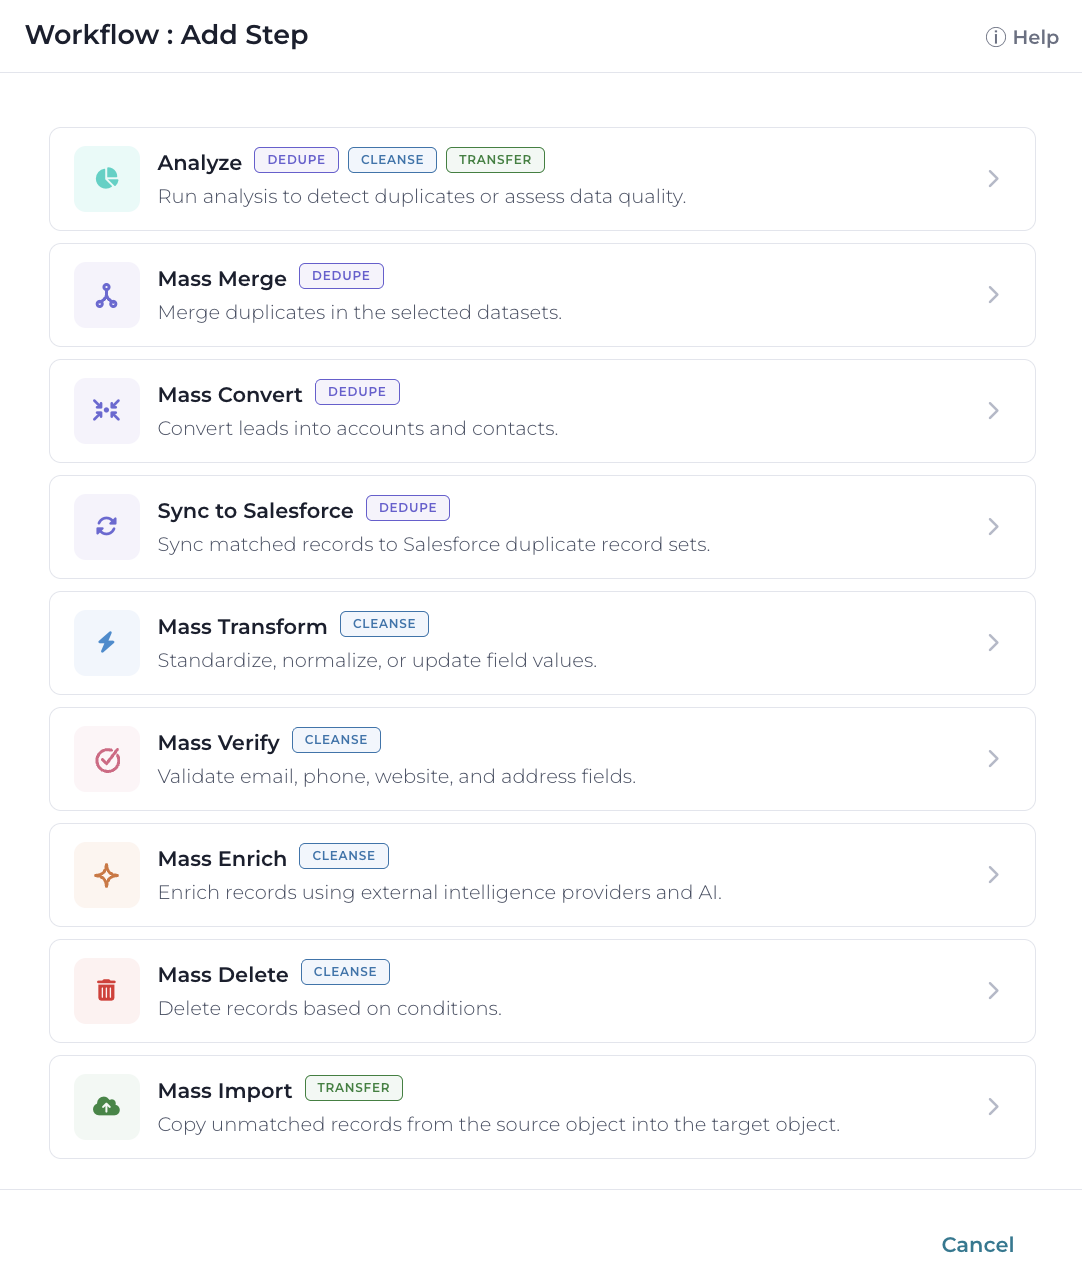
- Hit Add Step. A dialog will appear listing the available actions.
- Click an action tile to select it, then configure the step (see options below).
- Hit Save Step to add it to the pipeline.
- Repeat until your pipeline is complete, then drag the step cards to set the execution order.
A workflow must contain at least 2 steps and can contain up to 10. The available actions are:
- Analyze (Dedupe) — run analysis to detect duplicates or assess data quality.
- Mass Merge (Dedupe) — merge duplicates in the selected datasets.
- Mass Convert (Dedupe) — convert leads into accounts and contacts.
- Sync to Salesforce (Dedupe) — sync matched records to Salesforce duplicate record sets.
- Mass Transform (Cleanse) — standardize, normalize, or update field values.
- Mass Verify (Cleanse) — validate email, phone, website, and address fields.
- Mass Enrich (Cleanse) — enrich records using external intelligence providers and AI.
- Mass Delete (Cleanse) — delete records based on conditions.
- Mass Import (Transfer) — copy unmatched records from the source object into the target object.
Depending on the action selected, the step configuration offers:
- Datasets — the dataset(s) the step runs on. Only datasets valid for the selected action are shown.
- Re-analyze prior to running step — refresh the dataset analysis before the action executes.
- Match confidence (merge, convert, and sync actions) or Validity score (cleanse actions) — the threshold that determines which records the step applies to.
- Salesforce duplicate rule — required for Sync to Salesforce.
- Filter — advanced filtering by tags, matching models, matched-on fields, and cluster size.
- Continue on error — if this step fails, proceed to the next step instead of halting the workflow.
Note: By default, a failing step stops the workflow run. Enable Continue on error on non-critical steps to let the rest of the pipeline complete.
Step 2: Set the Schedule
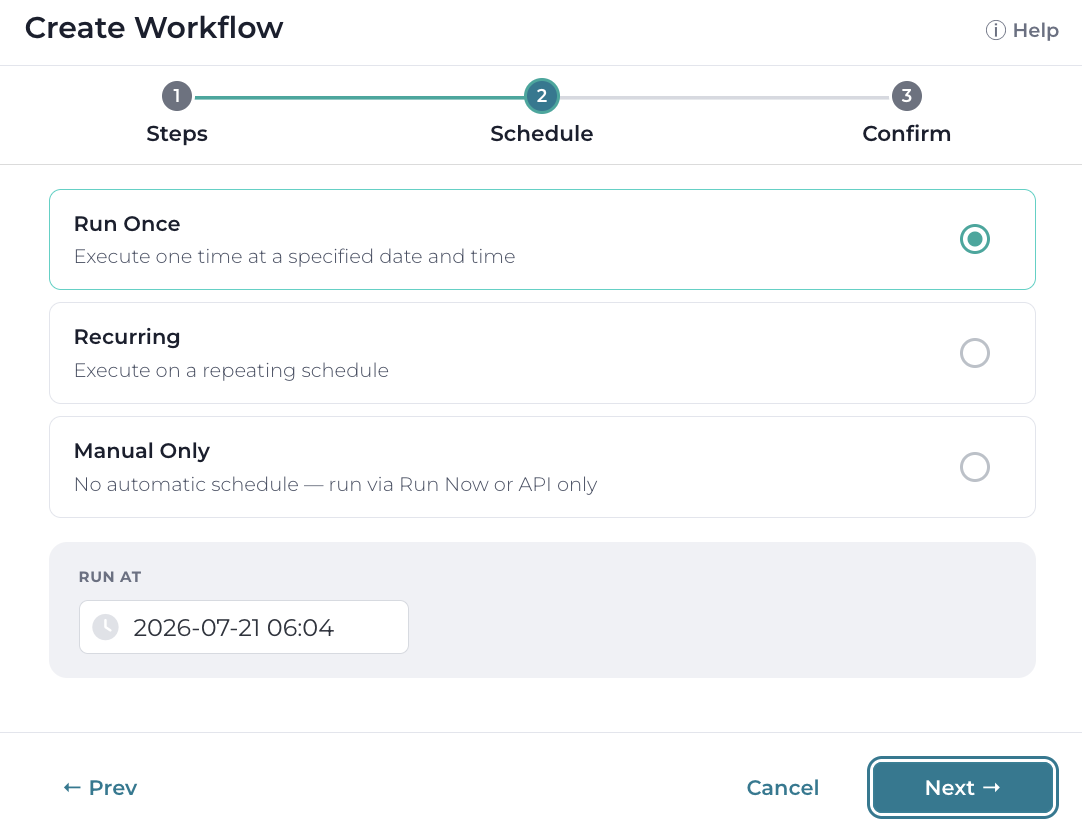
Choose one of three schedule types:
- Run Once — execute one time at a specified date and time.
- Recurring — execute on a repeating schedule. Specify the interval and frequency (hours, days, weeks, or months) and the run time. For hourly and daily frequencies you can also restrict execution to specific days of the week.
- Manual Only — no automatic schedule; run via Run Now or the API.
Step 3: Confirm
Specify a Workflow Name and an optional Description, and enter Notification Emails — the recipients of the completion email (your own email is pre-filled). Review the step chain and schedule summary, then hit Create Workflow.
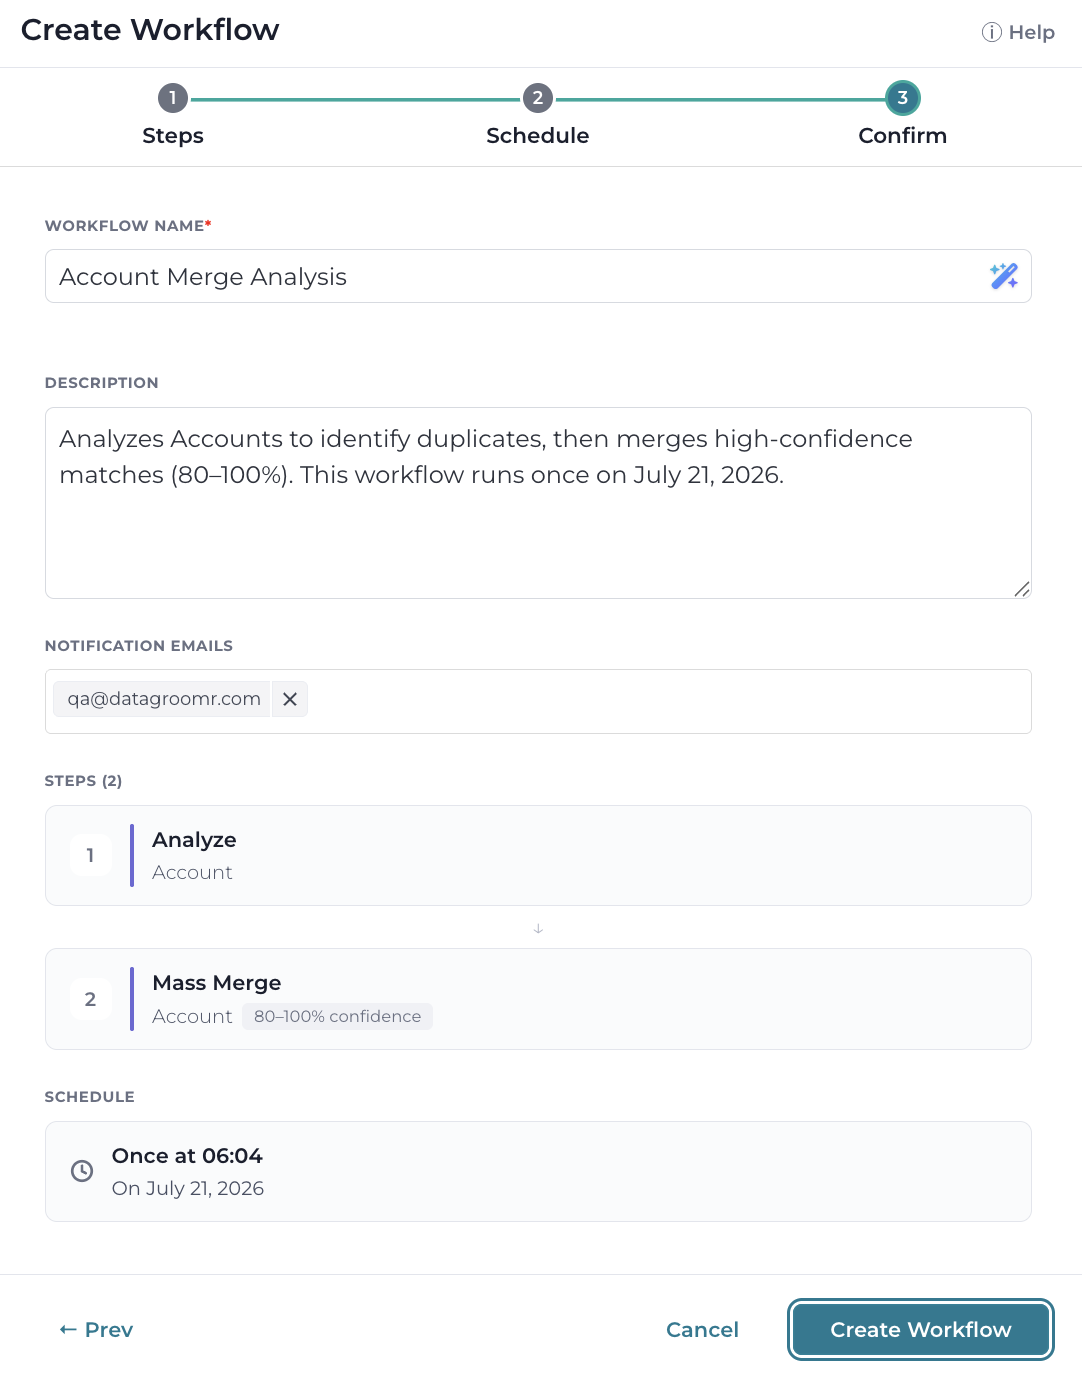
Good to Know: The wand icon next to the Workflow Name field generates a suggested name and description with AI, based on the steps you configured.
Managing Workflows
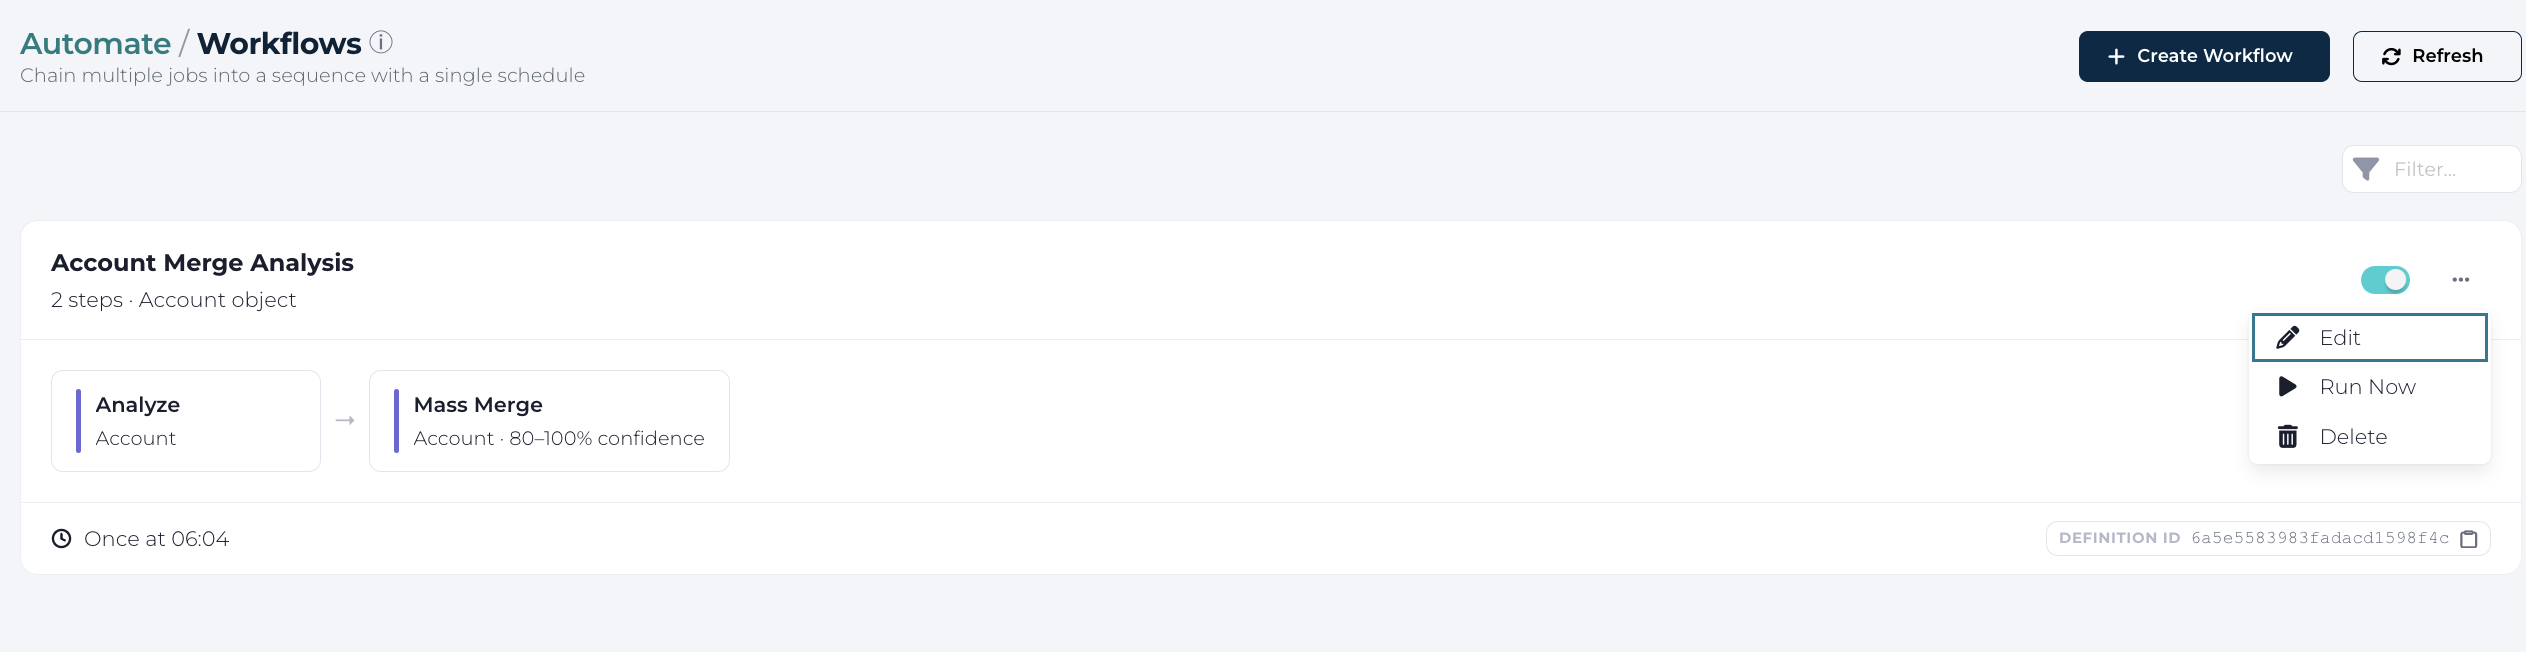
Each workflow appears as a card on the Workflows page showing its steps, schedule summary, last run time, and duration. From the card you can:
- Enable or disable the workflow with the toggle switch. A workflow must be enabled to run, whether on schedule or manually.
- Run Now — start the workflow immediately from the card menu.
- Edit — reopen the wizard to change steps, schedule, or settings.
- Delete — remove the workflow. Deletion is not available while a run is in progress.
Monitoring Runs and Notifications
While a workflow is running, its card shows a Running indicator with step progress (for example, Running 2/5). The page refreshes automatically as the run advances.
When the run completes, a notification email is sent to the configured recipients. It includes the overall run status and duration, a per-step summary with each step's dataset, status, and any error details, and a link to view the full run report in the Audit Log.
Learn more: detailed run history and per-step reports are available in the Audit Log.