
This article walks you through setting up the Campaign Email Verification Flow of the DataGroomr Verify package.
Prerequisites
Before starting, ensure:
DataGroomr Verify package is installed in your Salesforce org
Step 1: Grant access to your users.
Salesforce administrators or users designated during the package installation can use the component without additional permission sets. However, regular users may encounter "Insufficient Privileges" errors, and the Verified Campaign Members tab will be hidden. To resolve this, the required permission sets must be assigned to the appropriate users.
Setup → Users → Permission Sets.
Open one of:
DataGroomr Verify Admin — full access (verify, manage credits).
DataGroomr Verify User (formerly Standard User) — verify and read DataGroomr fields; can update Contact/Lead Has Opted Out of Email where the set allows.
DataGroomr Verify Viewer (formerly Restricted User) — read-only on verification results.
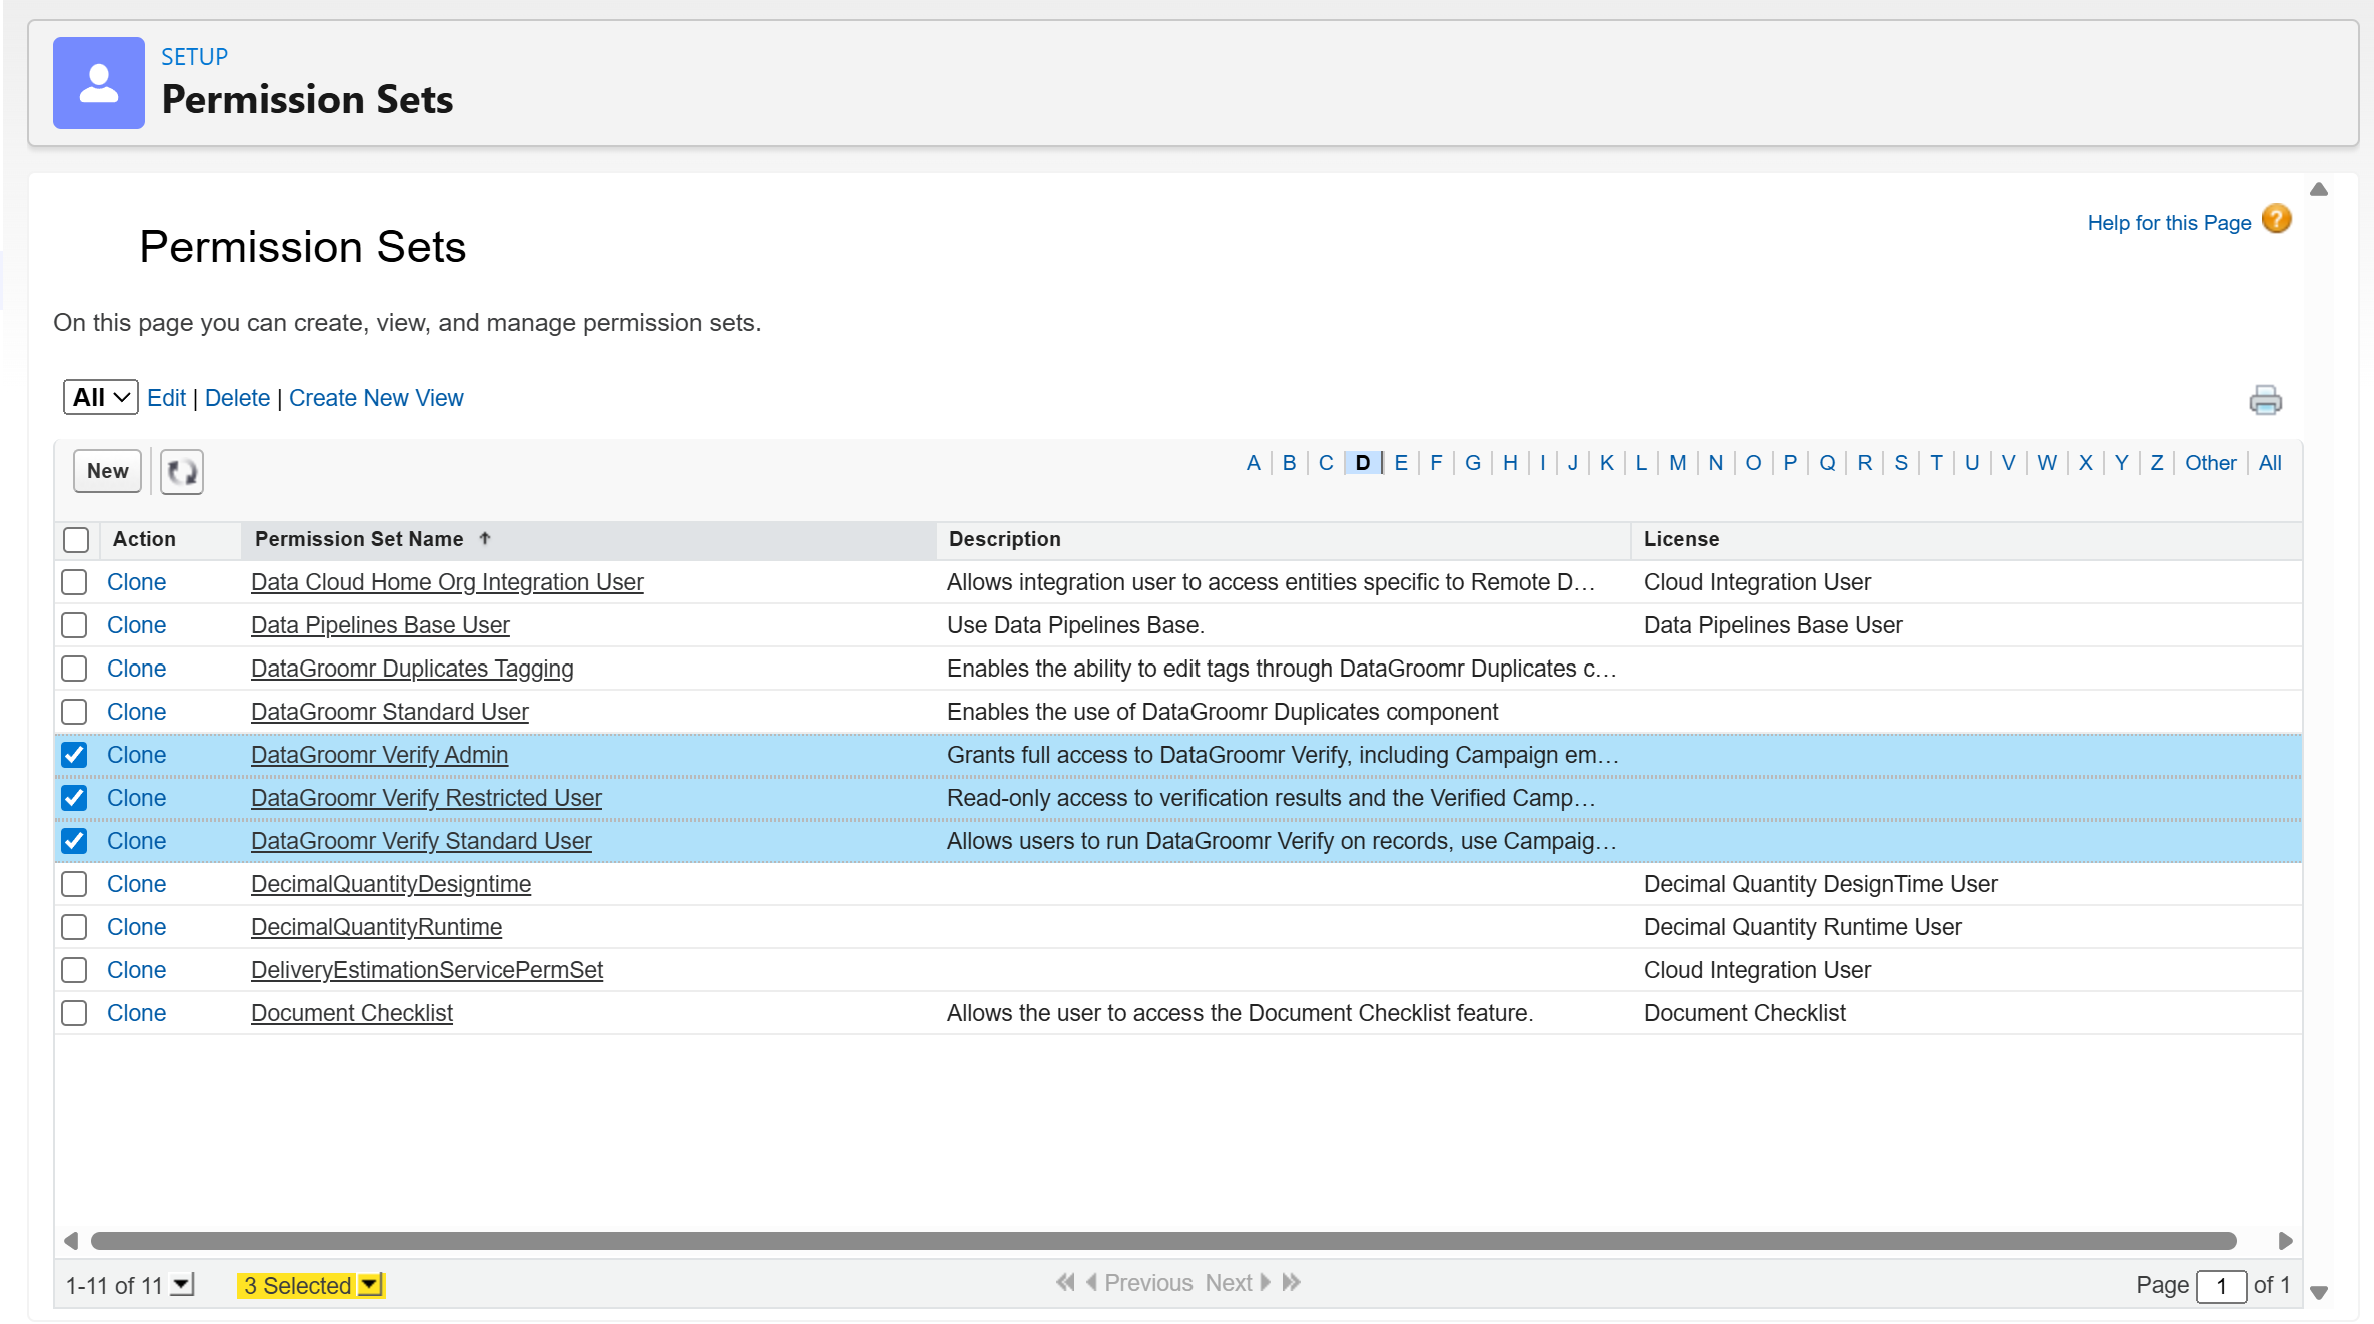
Manage Assignments → Add Assignment → select users → Assign.
Each set grants access to the Campaign verification Apex class, field-level security on the Campaign Member verification fields, and (where applicable) tab visibility for Verified Campaign Members.
Step 2: (Required) Add Verify Emails to the Campaign page layout
The quick action is installed but not placed on your layout by default.
- Setup → Object Manager → Campaign → Page Layouts → open your layout (often Campaign Layout).
- Open Mobile & Lightning Experience Actions (if prompted, click override once).
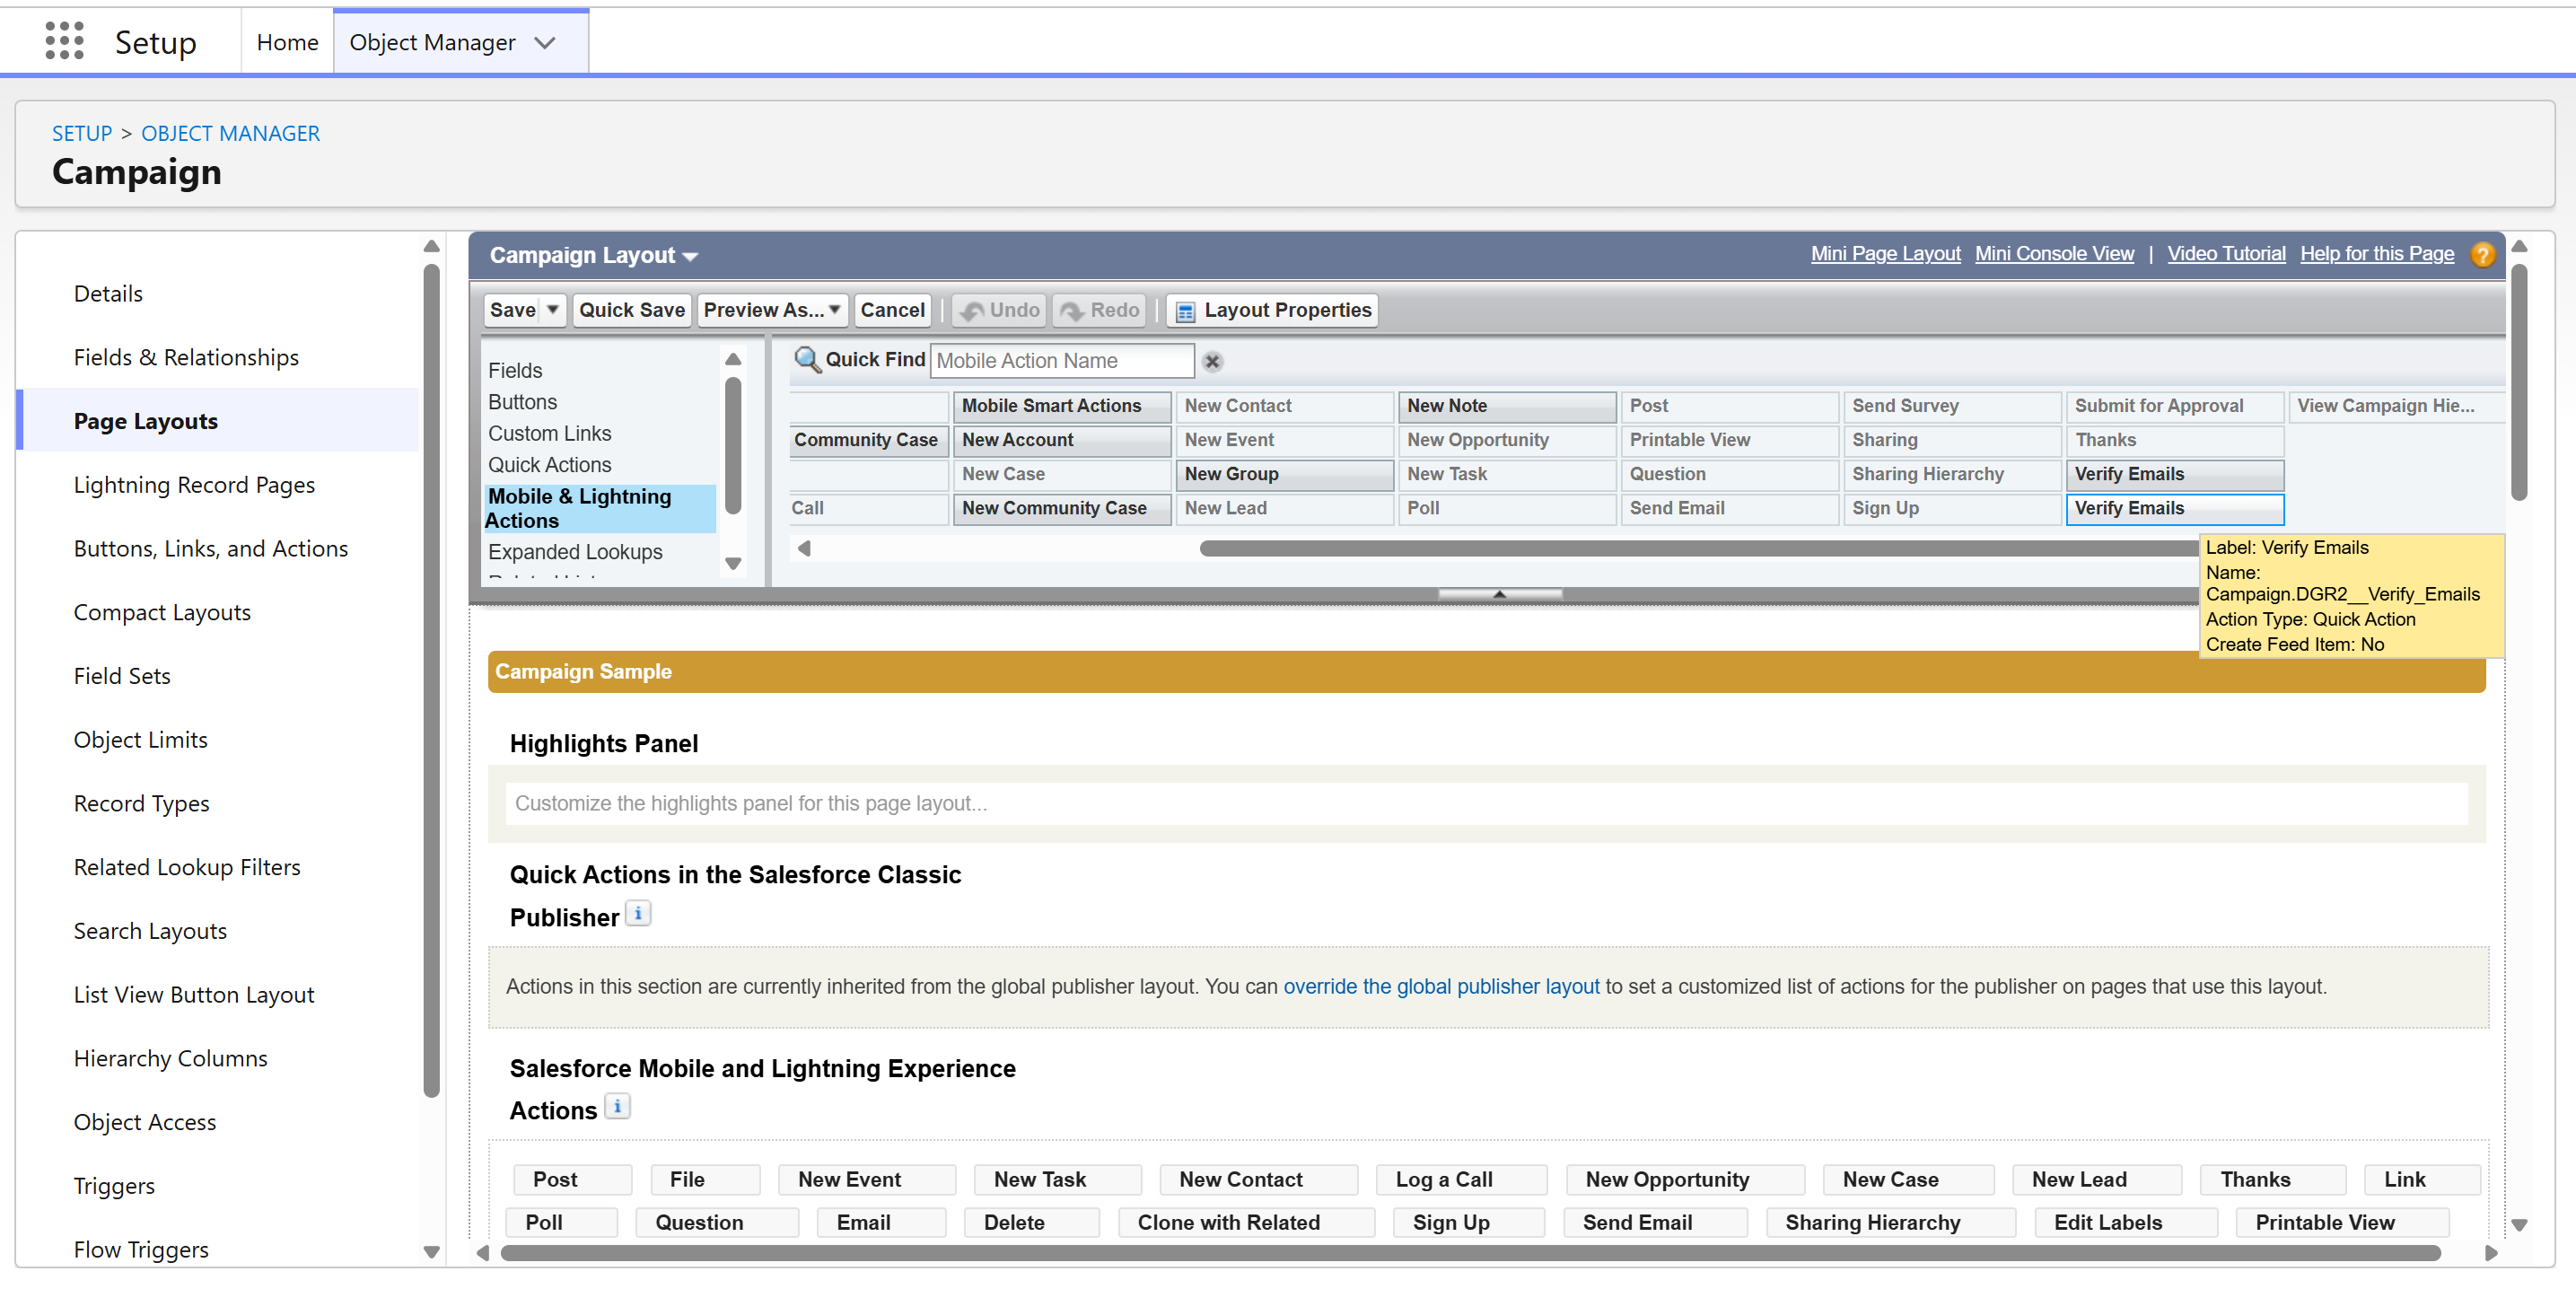
- Drag Verify Emails onto the action list (for example after Send Email).
- Save.
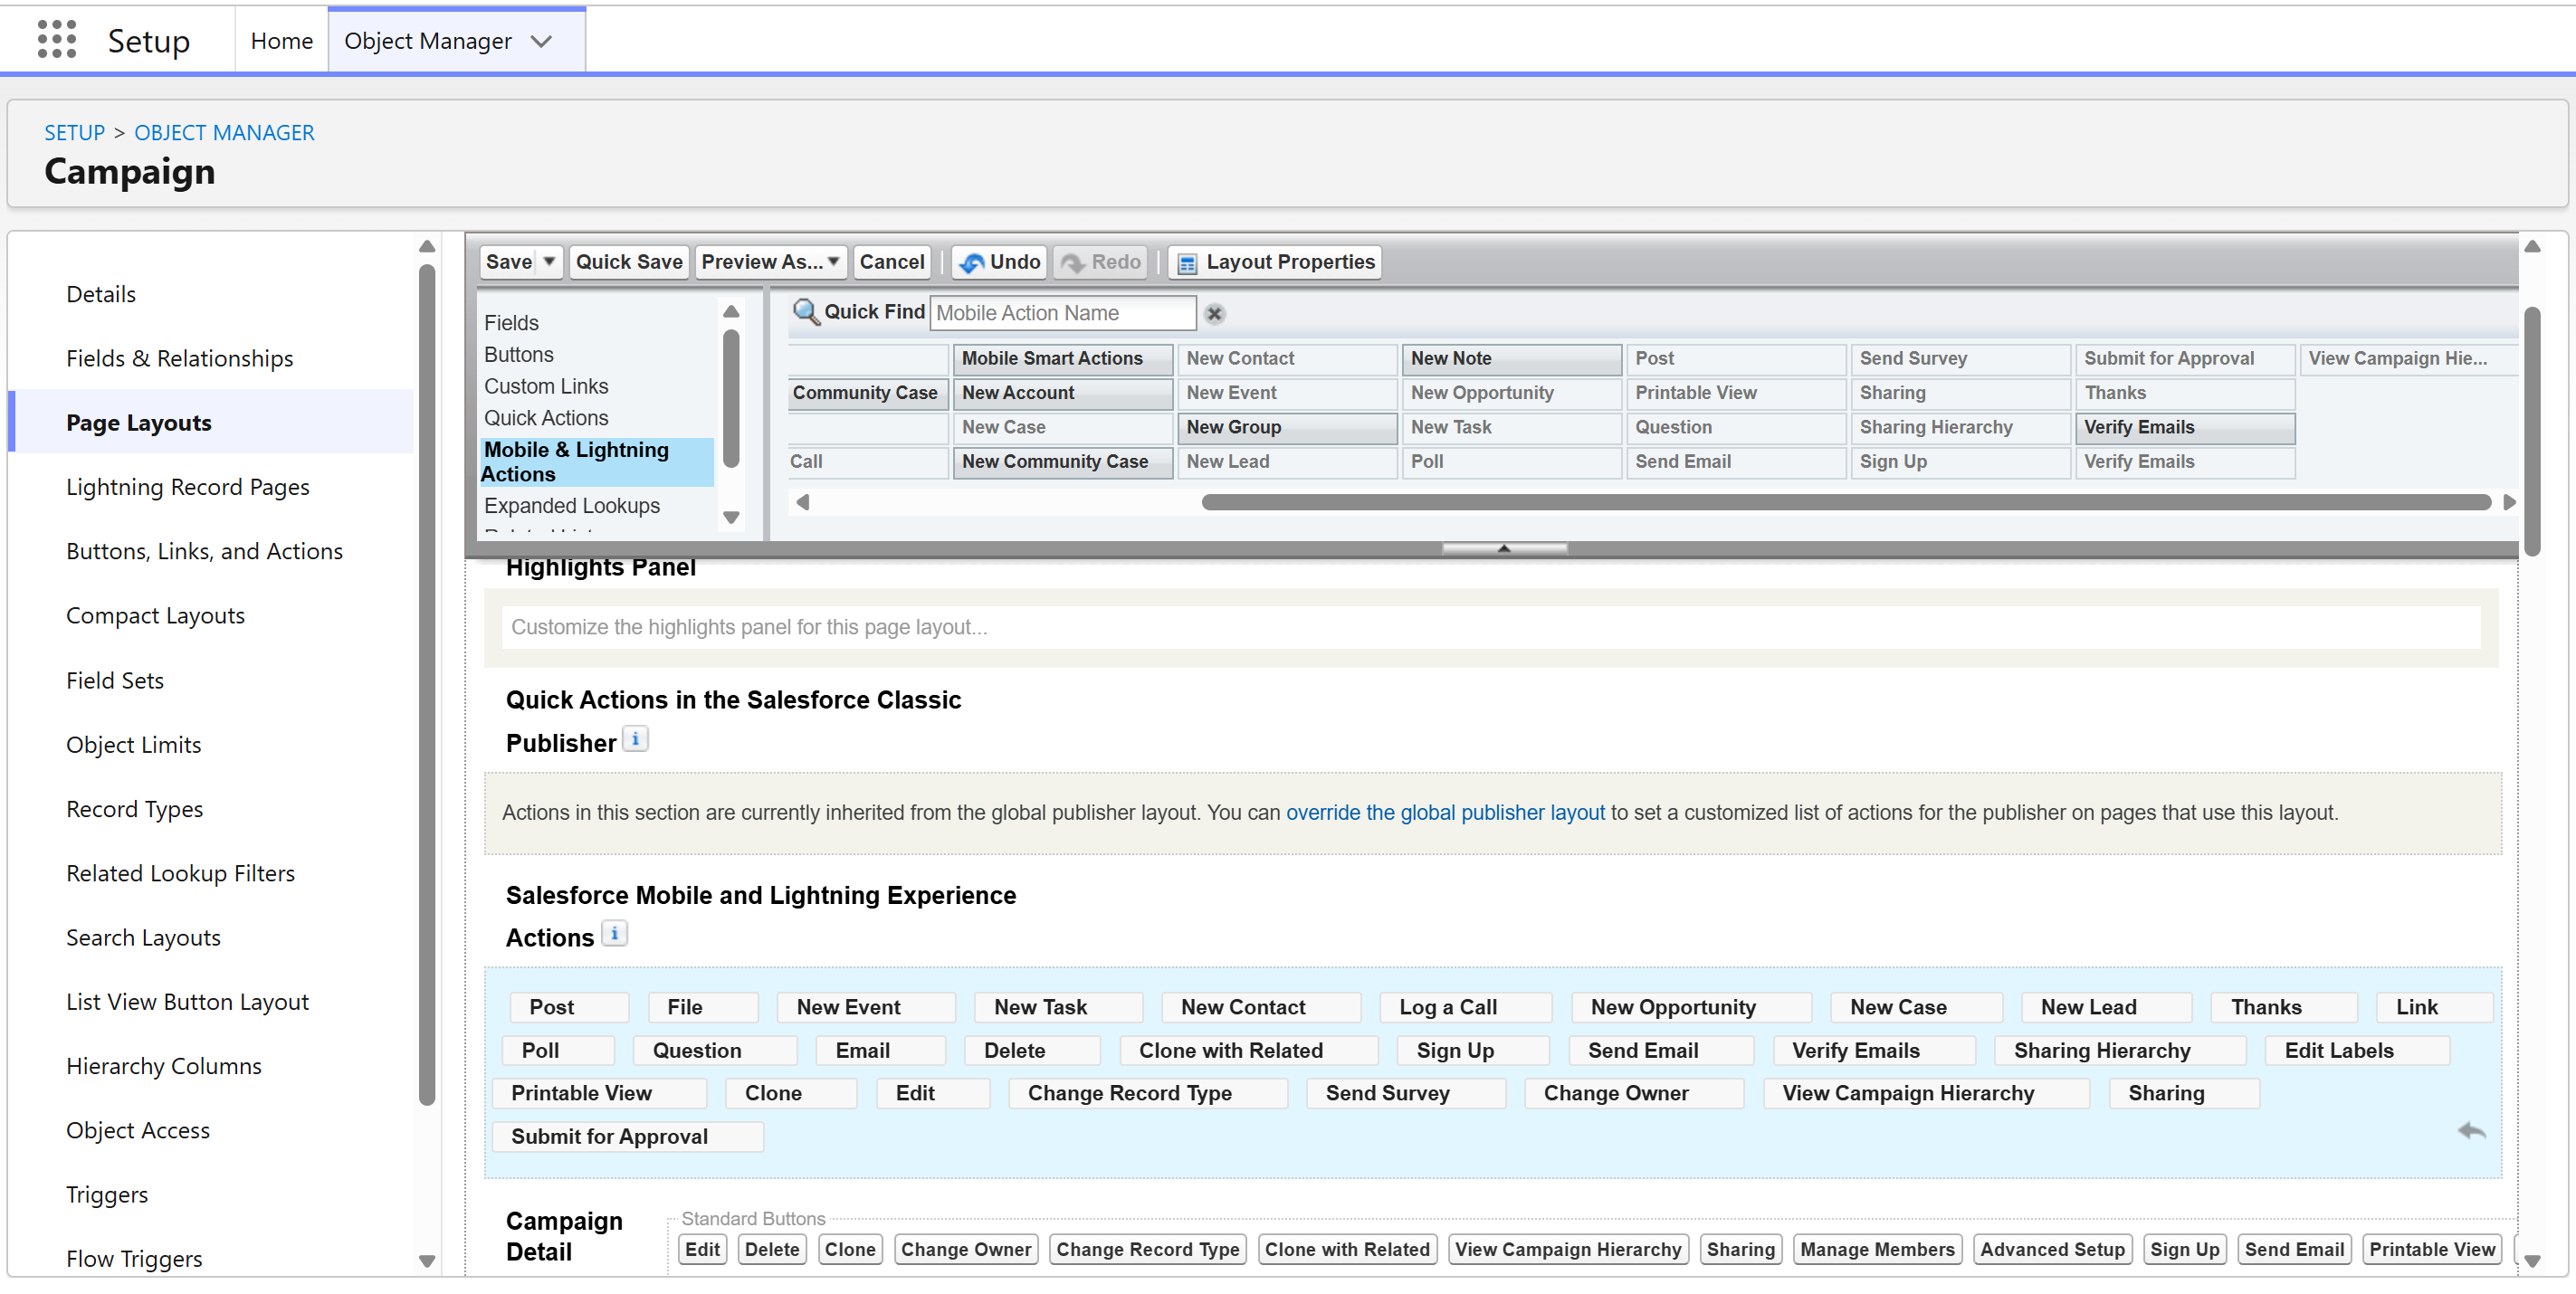
After this, the Campaign record’s actions menu should include Verify Emails.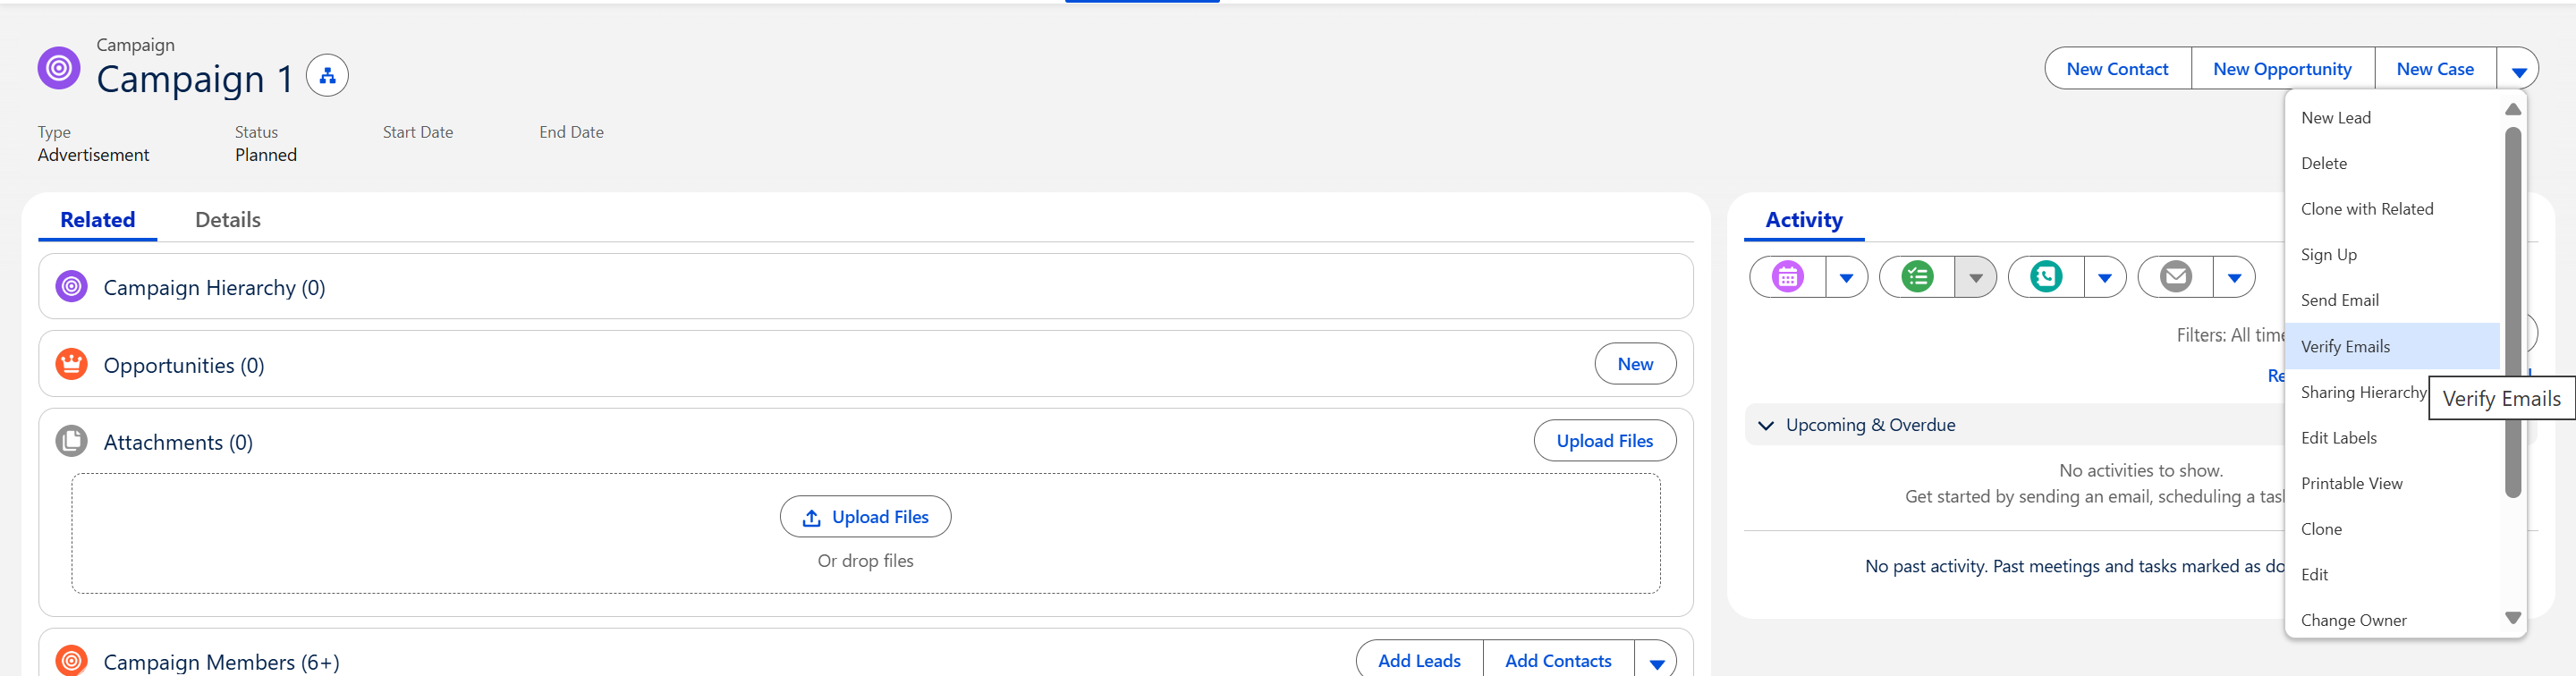
Step 3: Put the Verified Emails component on the Campaign record page (required for the preview list)
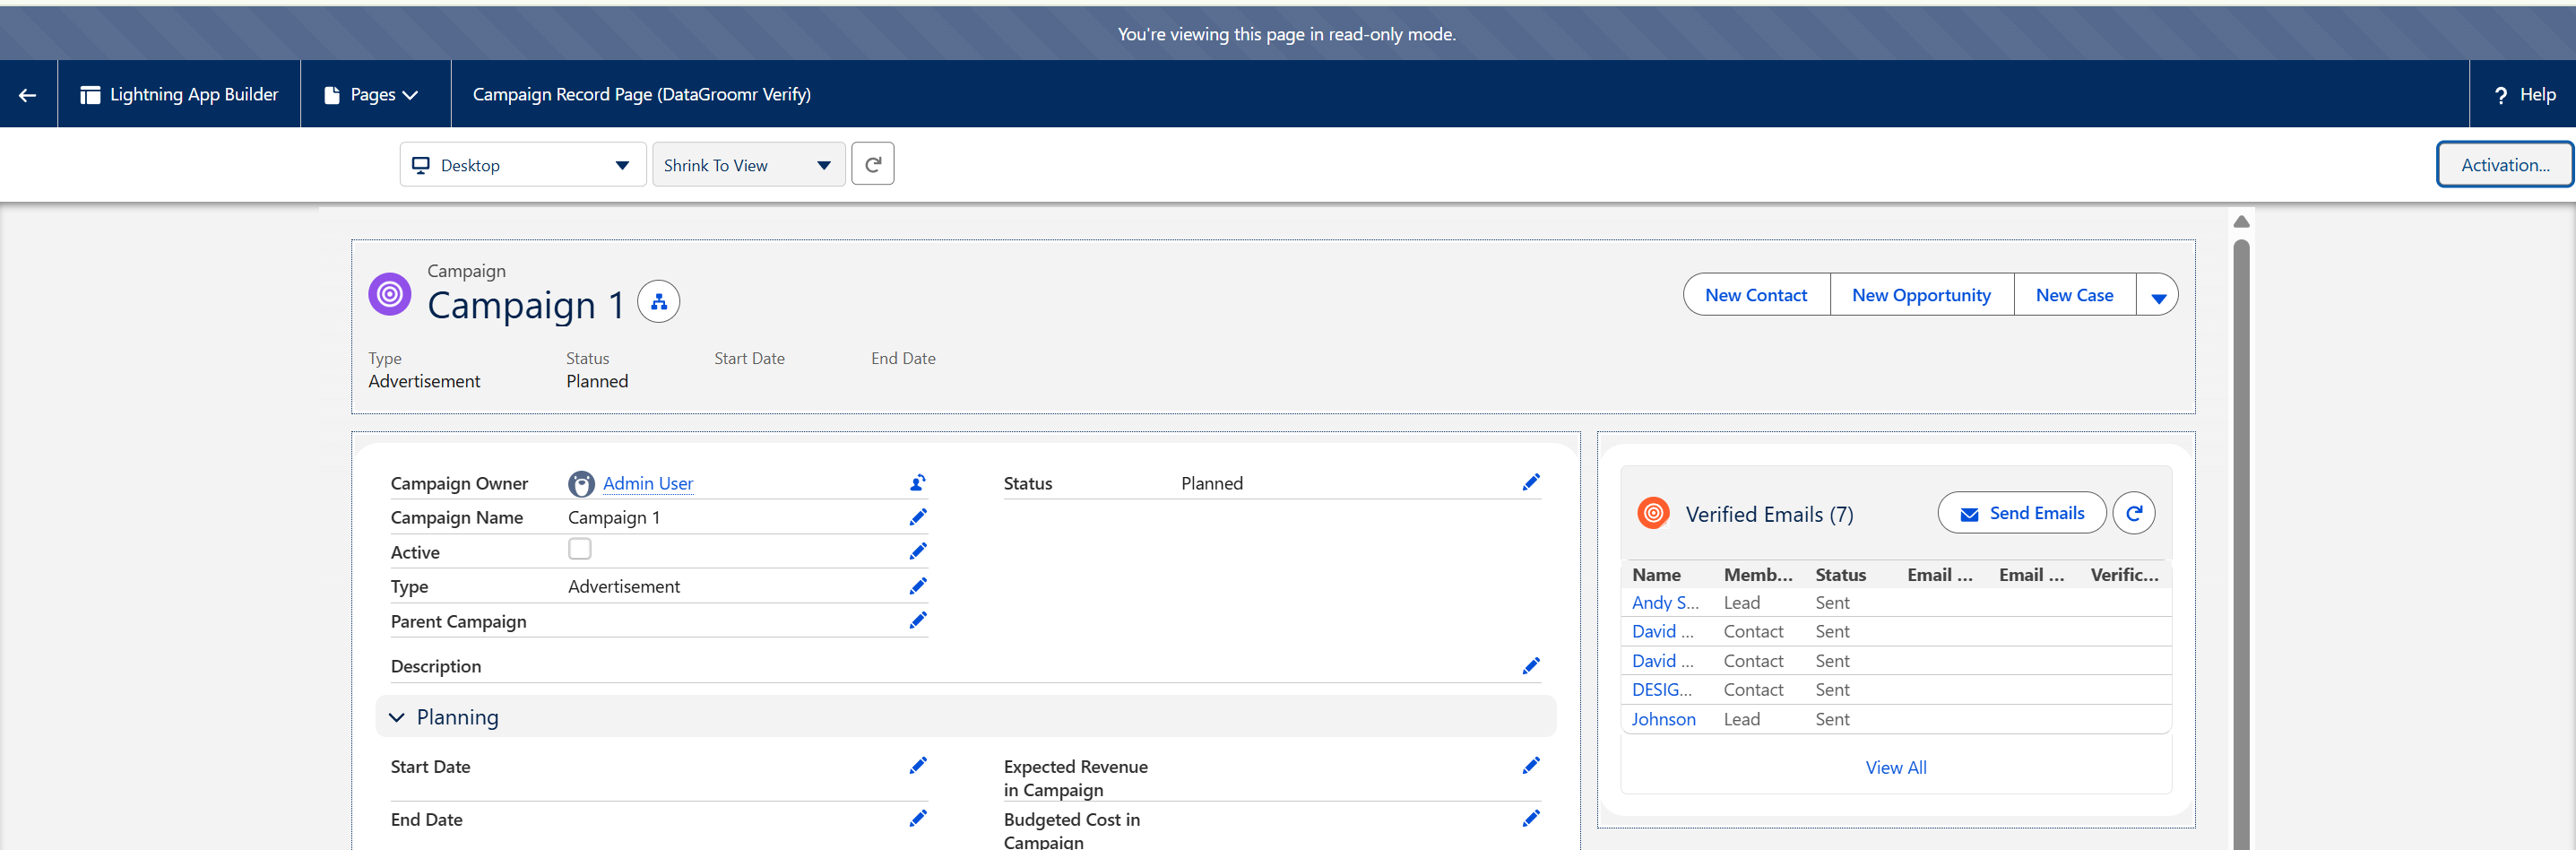
The package ships a ready-made Campaign Lightning record page — Campaign Record Page (DataGroomr Verify) — with the Campaign Members — Verified Emails component already placed.
Pick one option:
Option A (recommended) — assign the packaged page (one step):
- Setup → Object Manager → Campaign → Lightning Record Pages.
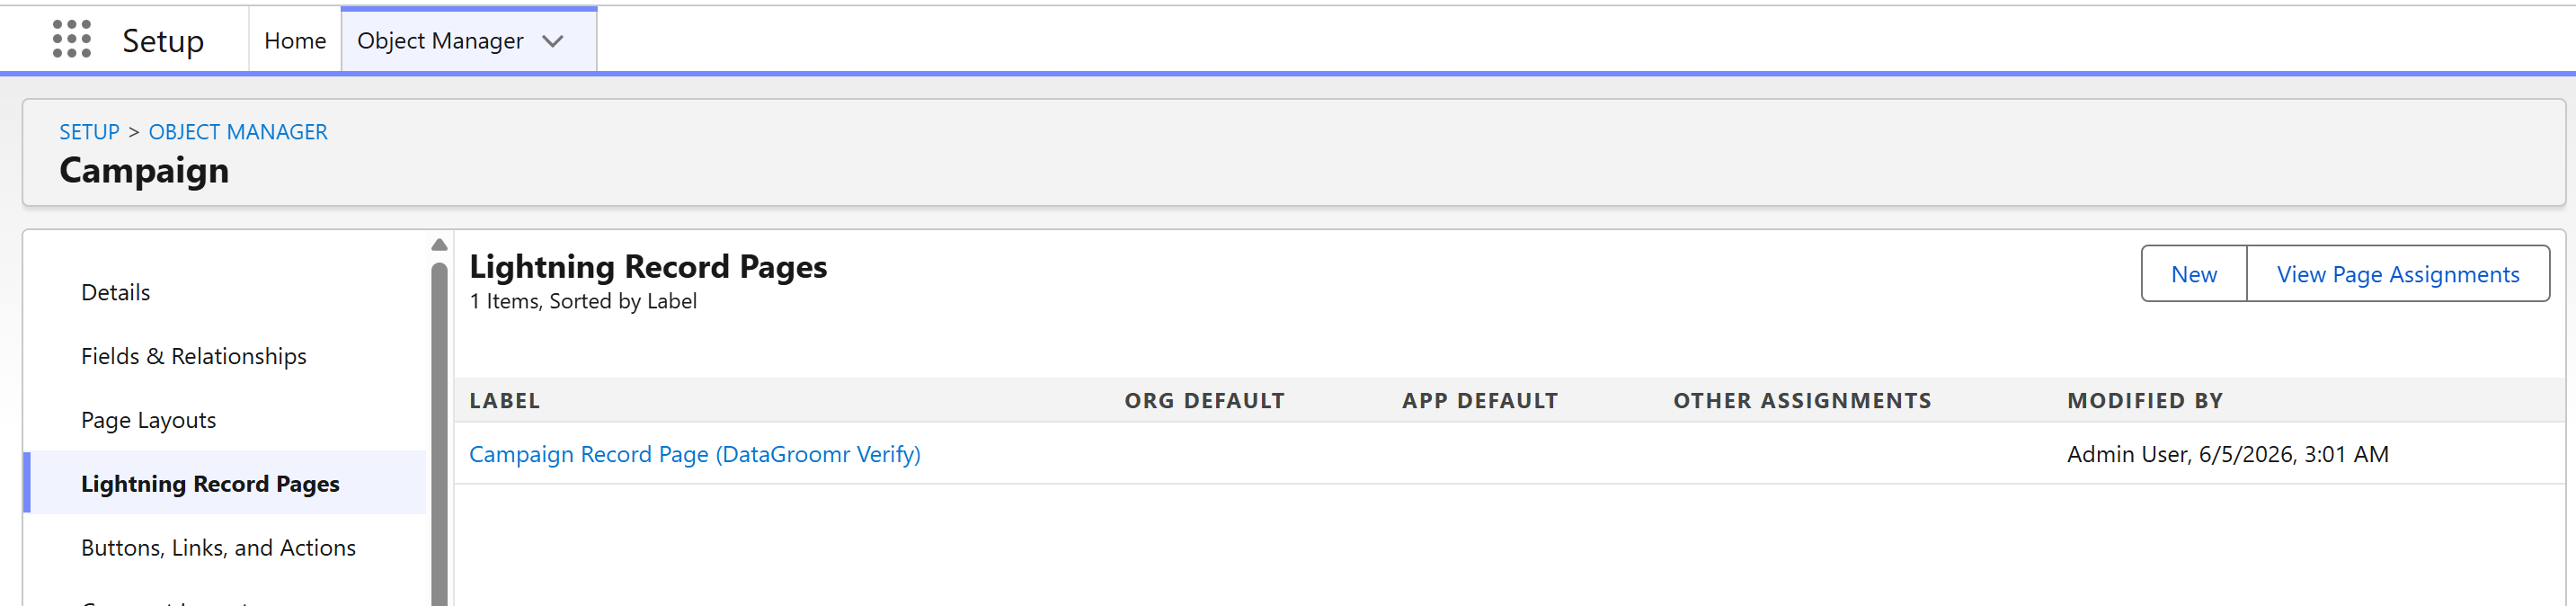
- Open Campaign Record Page (DataGroomr Verify) → Click View → Activation….
- Assign it as the Org Default (or App Default for the apps you want) → Save.
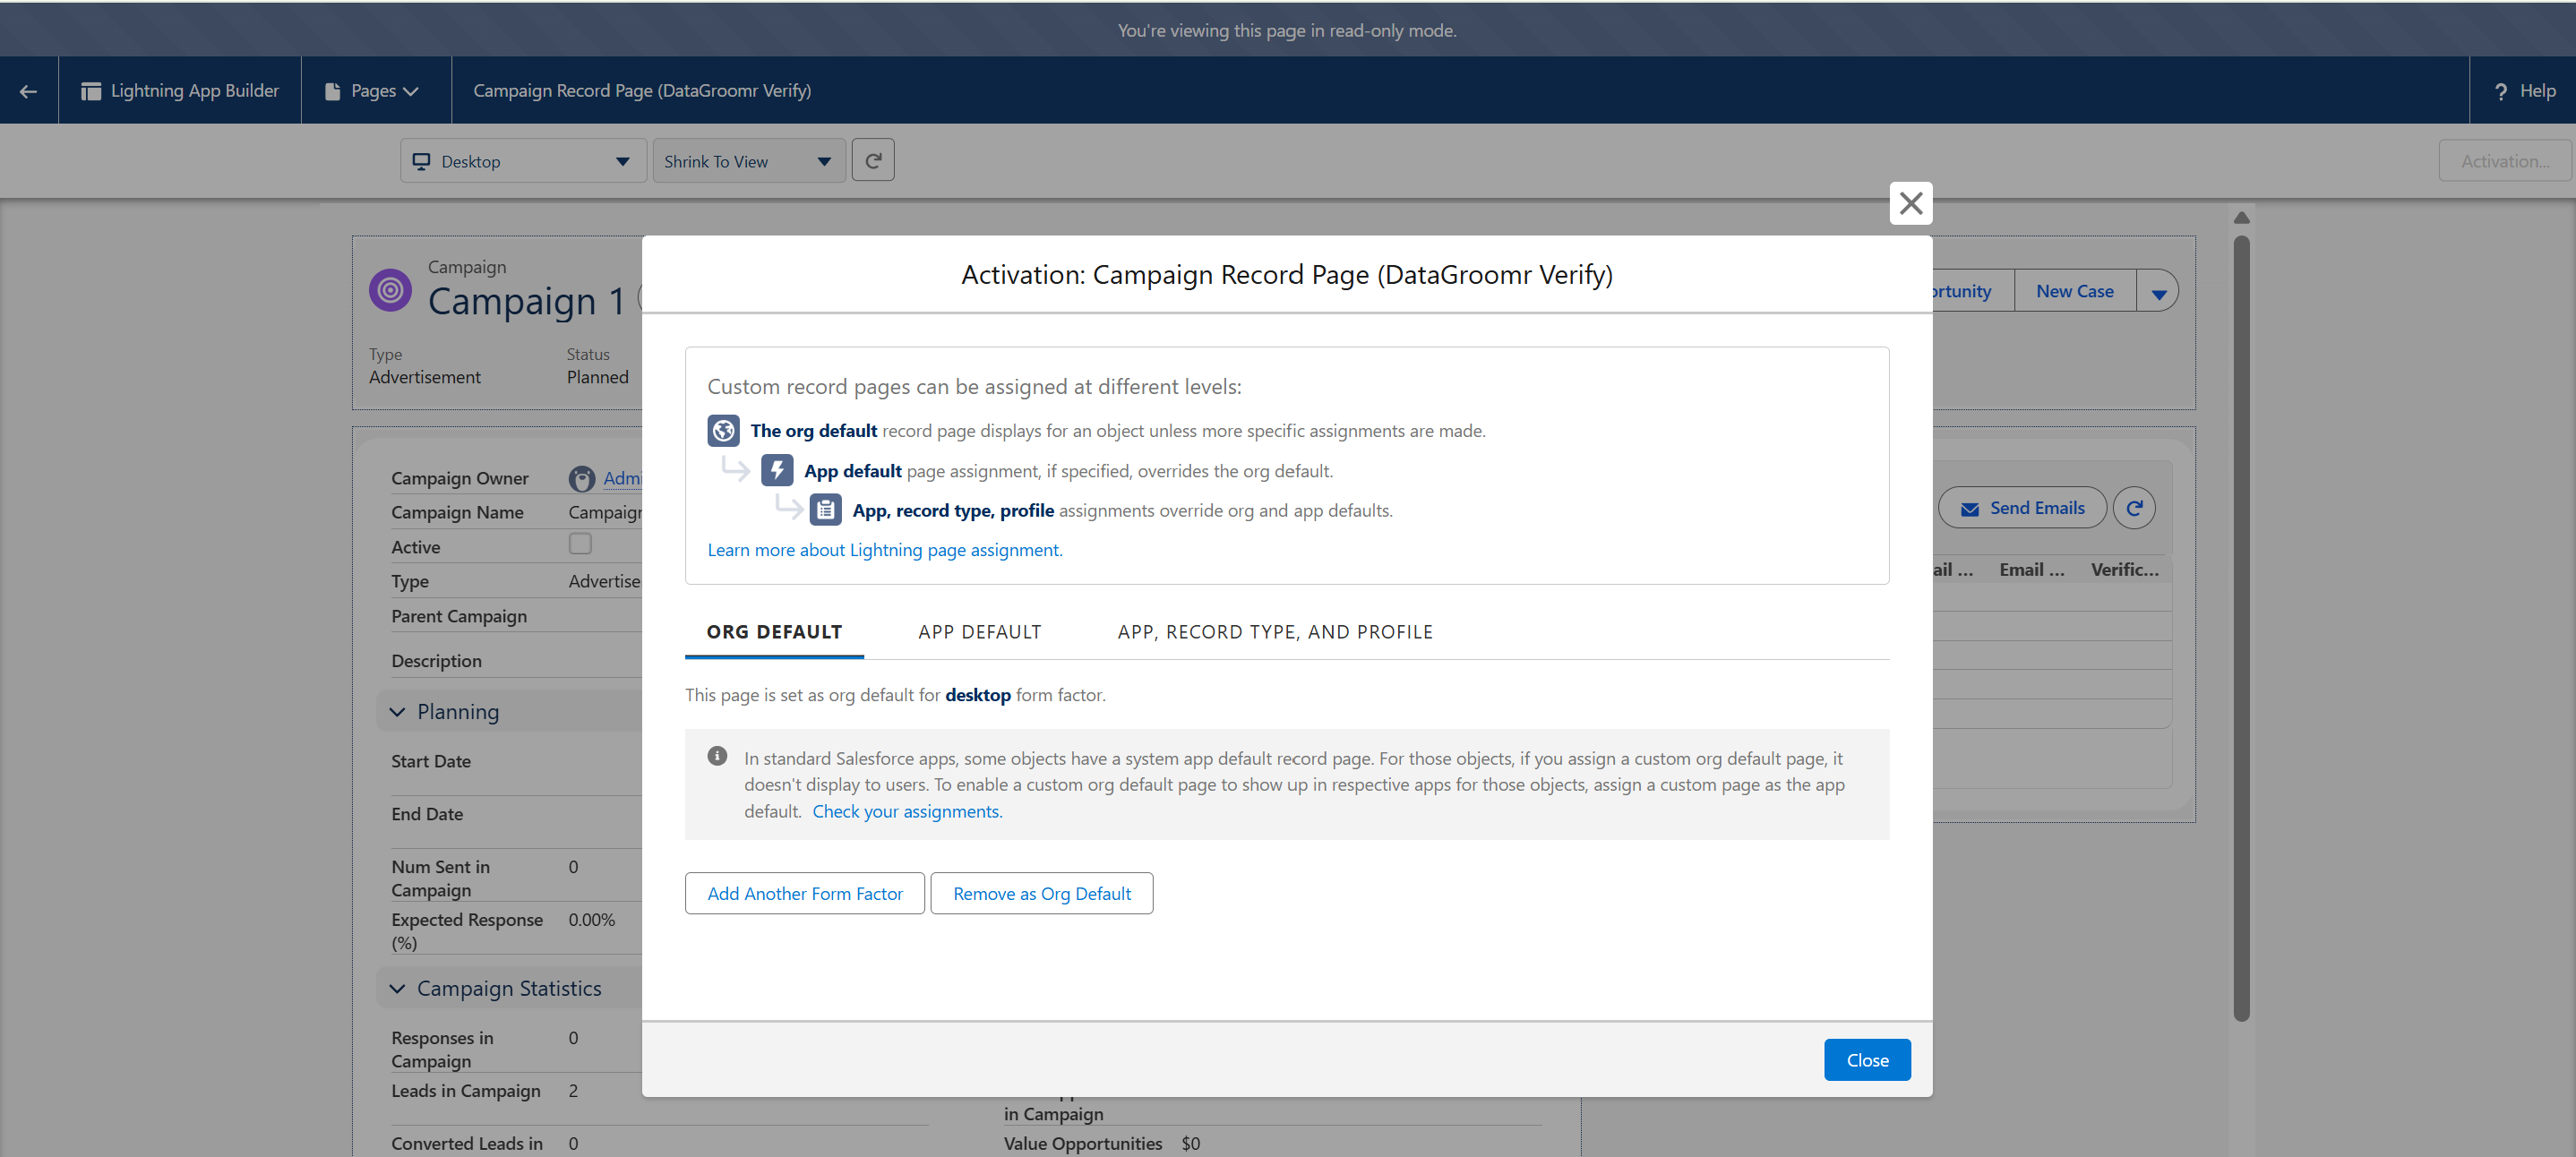
This skips the App Builder drag-and-drop. The page uses the standard Highlights Panel, which shows whatever actions are on your Campaign layout — so Verify Emails appears here automatically once Step 2 is done.
If you already maintain a customized Campaign record page you don't want to replace, use Option B instead.
Option B — add the component to your existing page:
- Open a Campaign in Lightning → gear icon → Edit Page.
- In the component palette, find Campaign Members — Verified Emails (or search “Verified”).
- Drag it to the desired region (often the Related area near Campaign Members).
- Save and Activate for the right app/profiles.
Step 4: Add Verify Emails button to the Campaign Members list
- Setup → Object Manager → Campaign → Page Layouts → open your layout (often Campaign Layout).
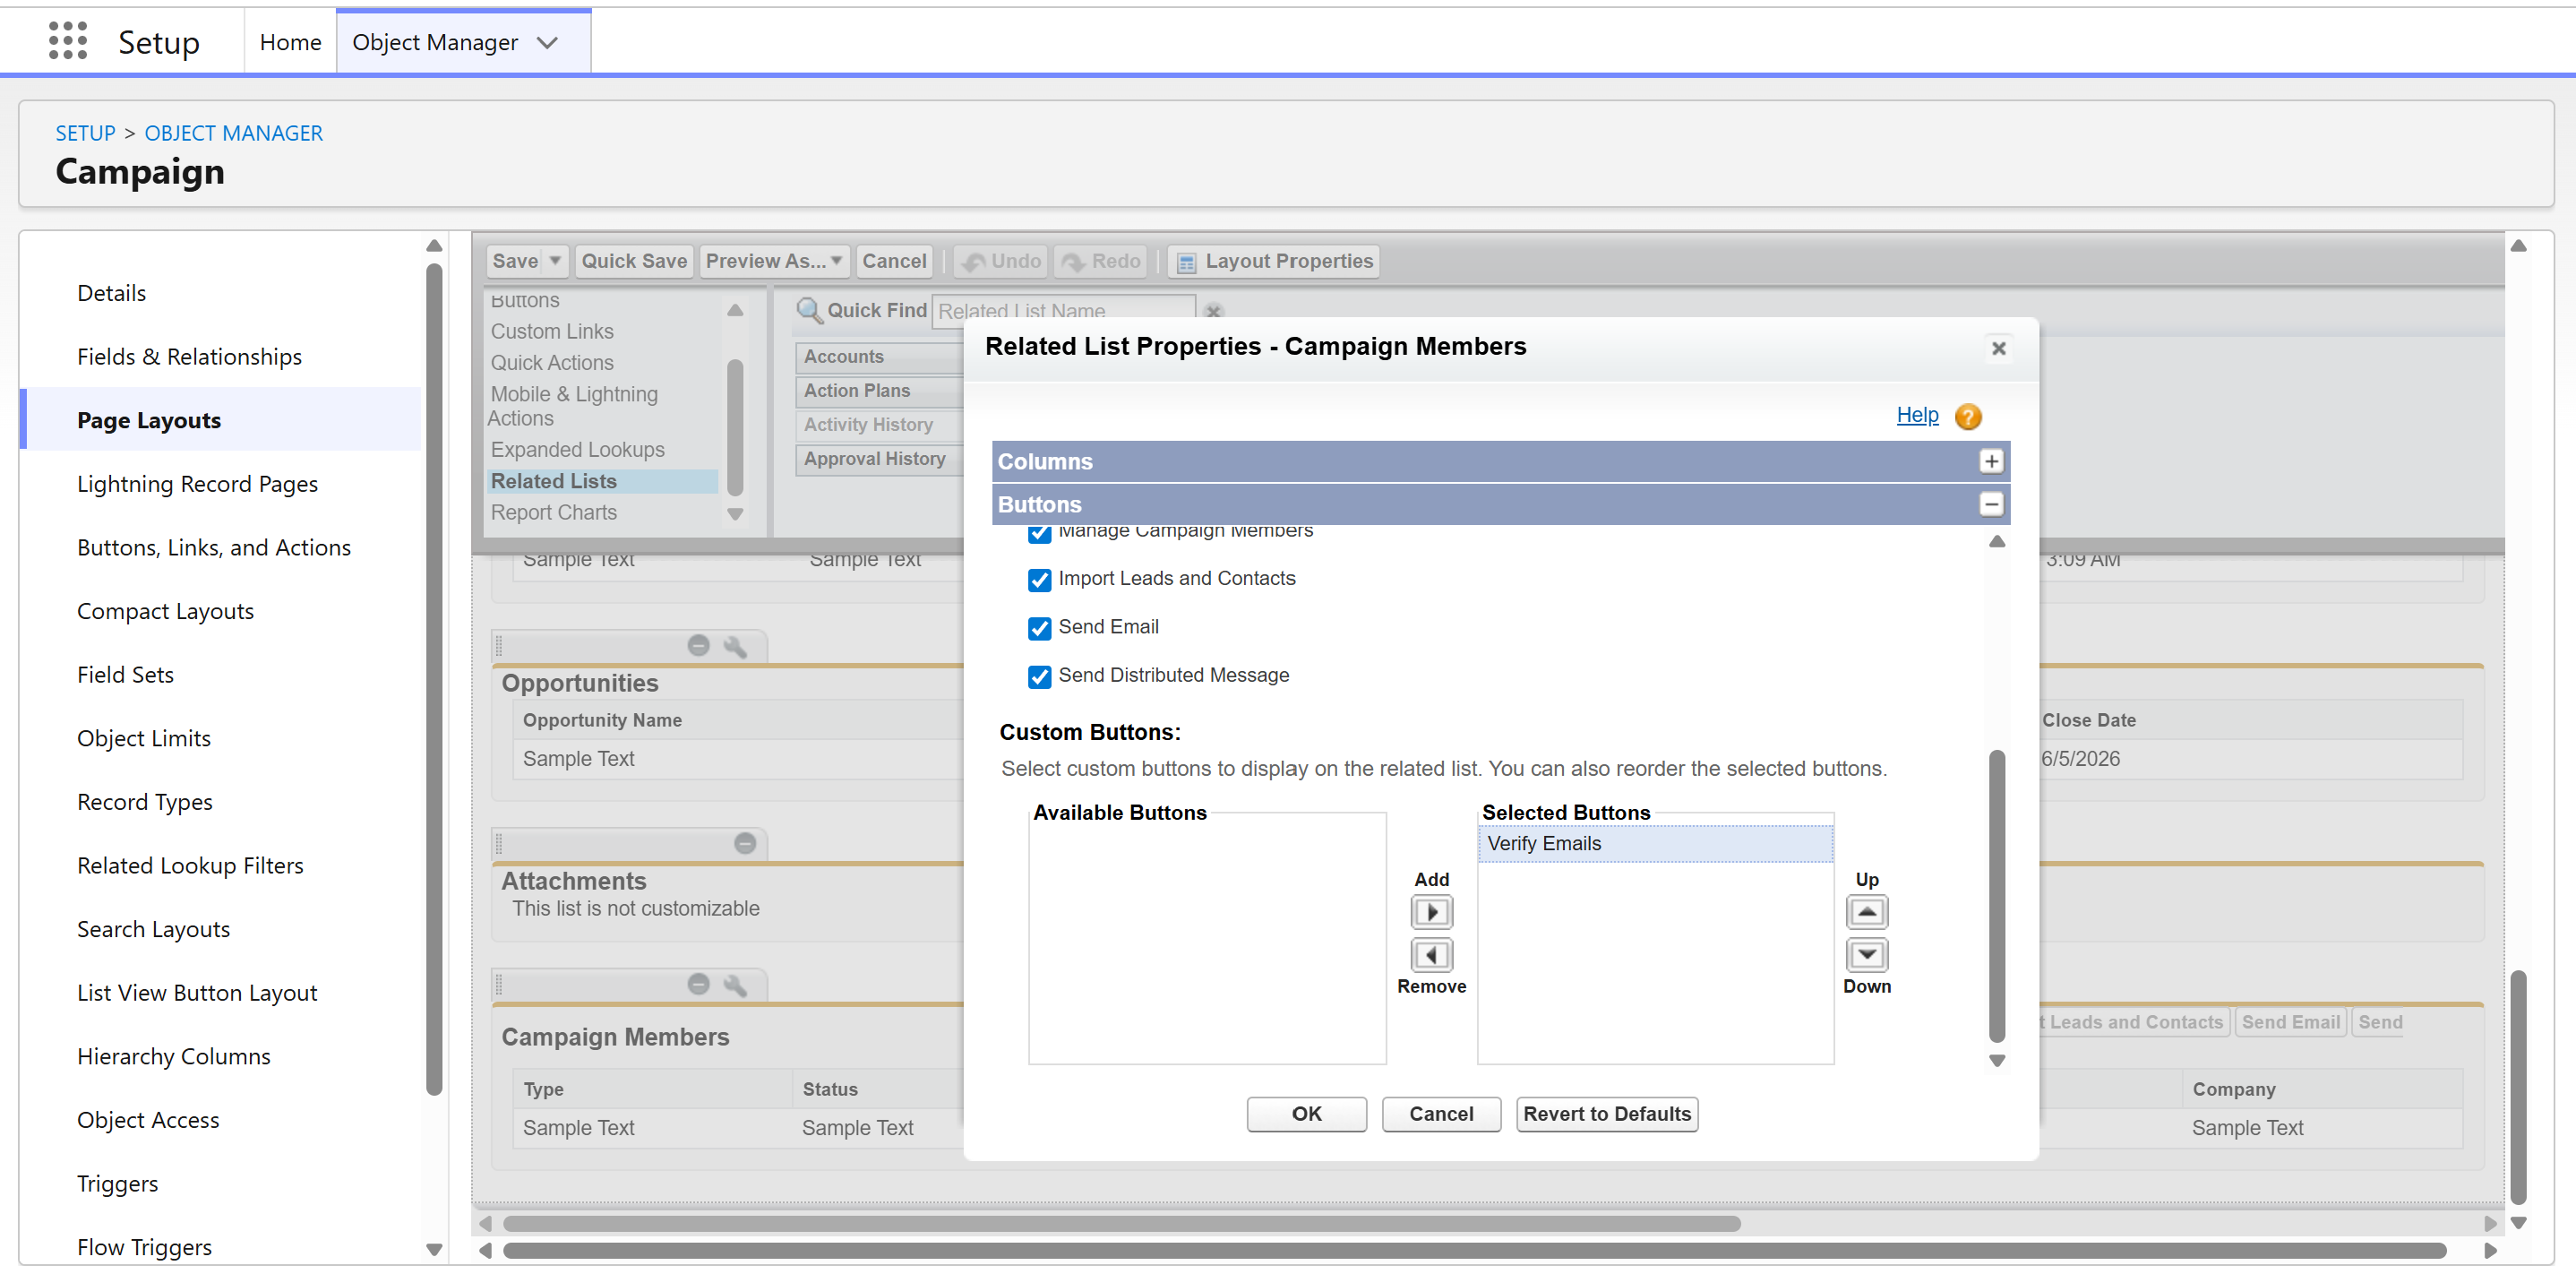
- Open Related Lists -> related list Campaign Members
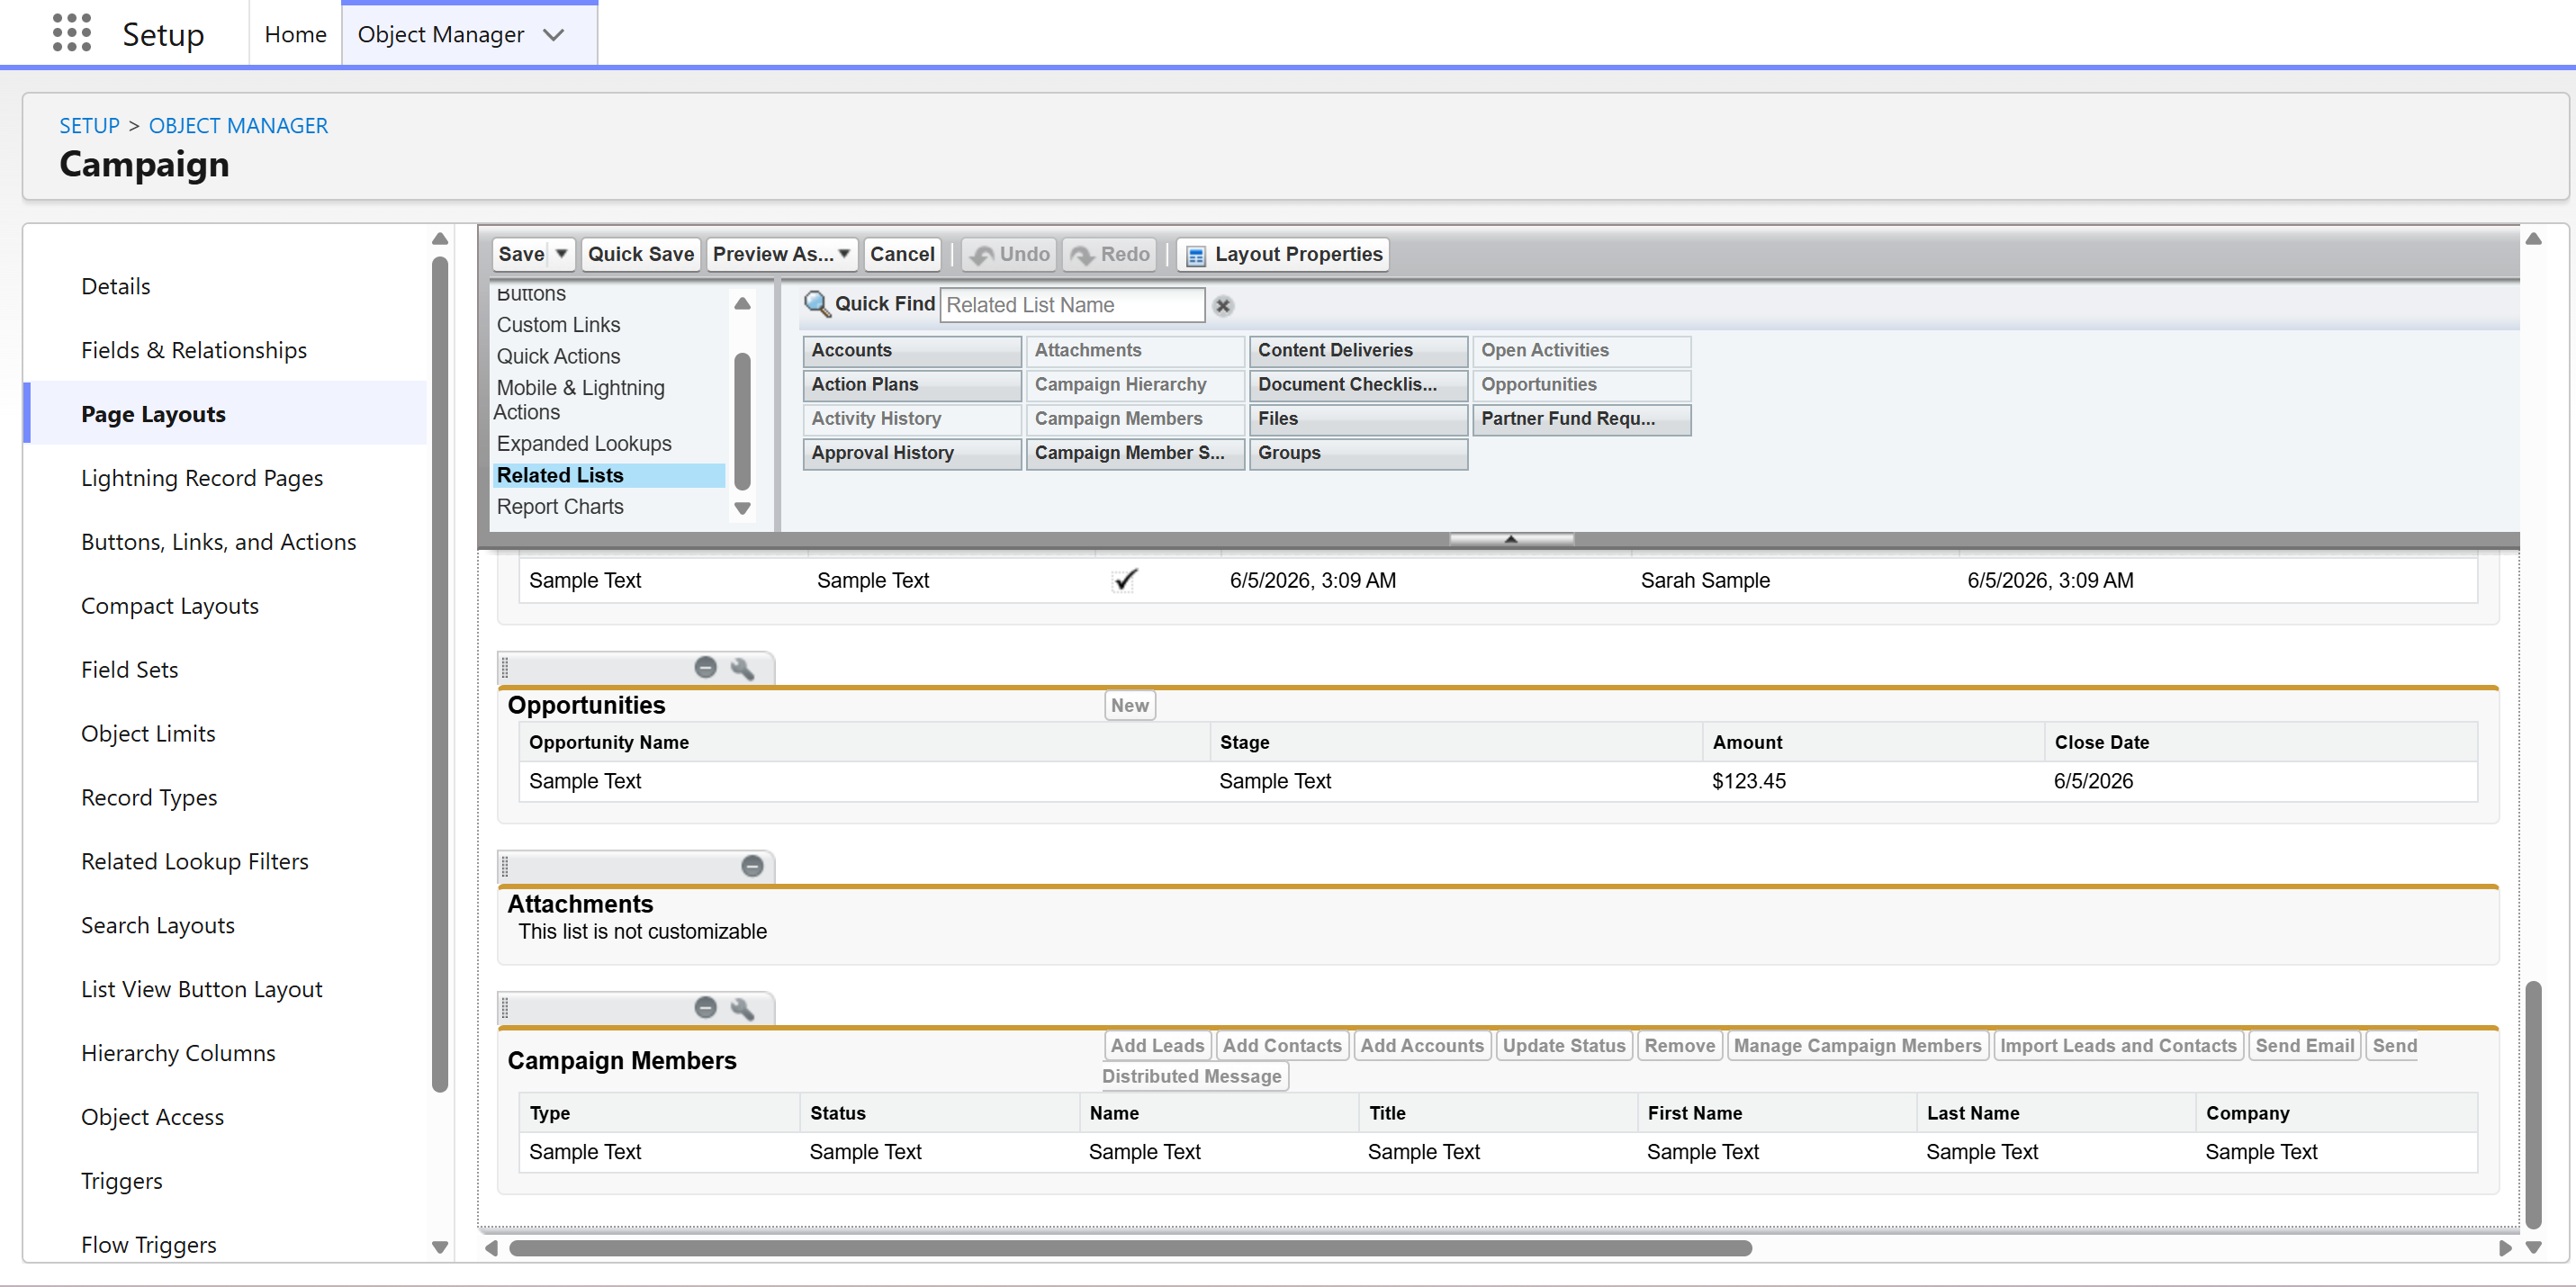
- Click on the wrench above Campaign Members → Expand Buttons → scroll down to view Custom Buttons and add Verify Emails custom button
- Save.
Step 5: (Optional) Control where Verify Emails appears in the actions dropdown
On many orgs the legacy highlights panel groups custom quick actions at the top of the overflow list, regardless of page layout order.
To pin order (e.g. right after Send Email):
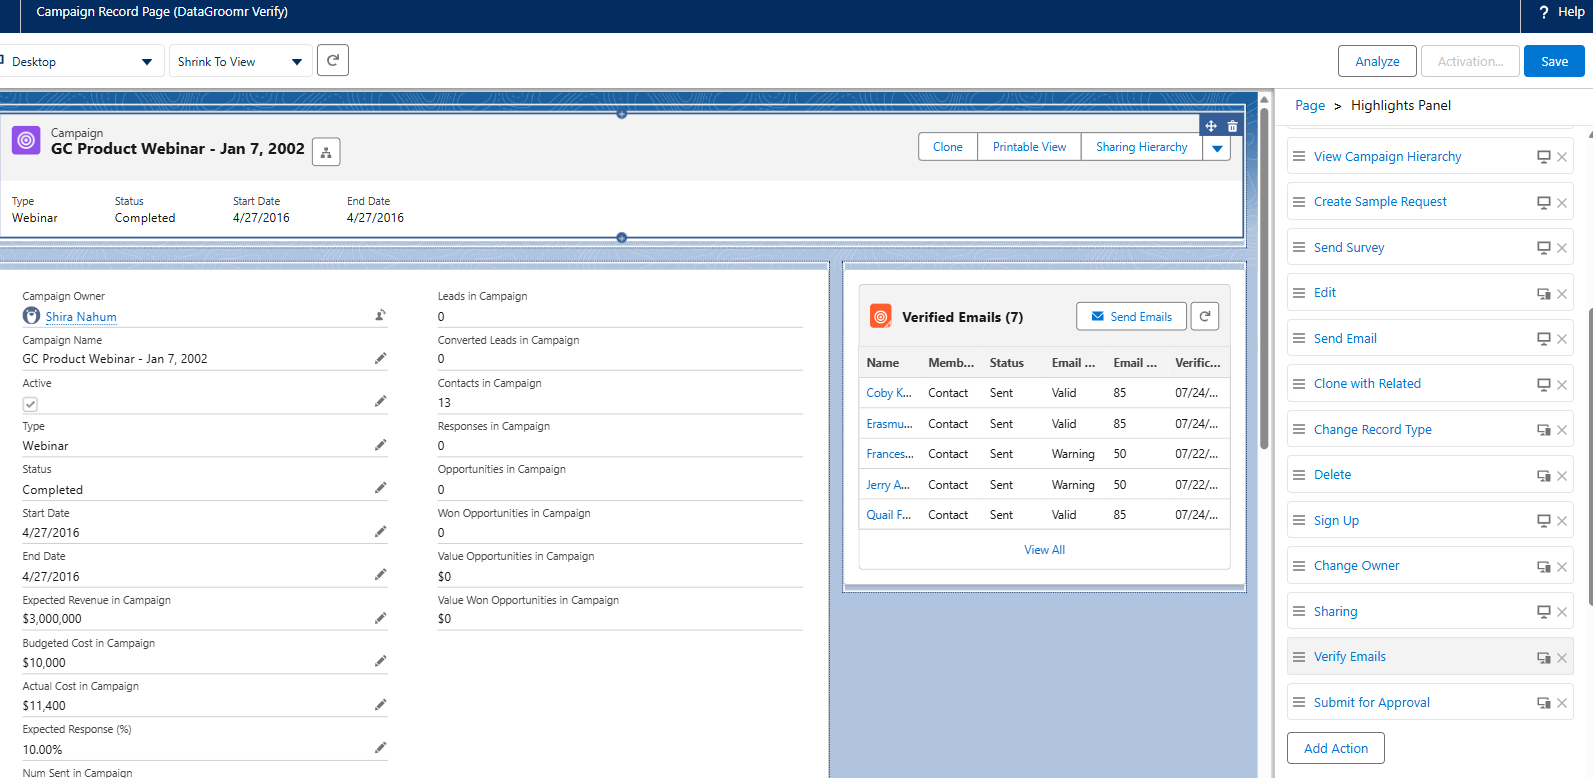
- Setup → Lightning App Builder → open the Campaign Lightning record page Click View.
- Select the Highlights Panel.
- Enable Override the action bar.
- Add Action for each action you want visible, including standard ones, and drag Verify Emails where you want it.
- Save → Activate.
Step 6: (Optional) Legacy WebLink buttons
The package includes Web Links for Campaign and Campaign Member that open the same verification UI via a URL-addressable Aura host. They are not required if you use the quick action.
To show packaged buttons:
- Setup → Object Manager → Campaign or Campaign Member → Page Layouts.
- Add the Verify Emails custom button where your layout supports it.
- Save.
Step 7: (Optional) Put Verified Campaign Members in an app navigation bar
Users with the right permission set can open the tab from the App Launcher or via View All on the widget.
To pin it to a Lightning app:
- Setup → App Manager → Edit the app.
- Navigation Items → Add → Verified Campaign Members → Save.
Troubleshooting:
“Verify Emails” does not appear in the menu.
Confirm Step 2 and that the user’s profile/record type uses the layout you edited (Page Layout Assignment).
Action appears at the top of the list though I ordered it later on the layout.
See Step 5 (highlights panel override).
Widget is empty / Insufficient Privileges.
Assign a DataGroomr Verify permission set (Step 1).
View All opens but shows “Page doesn’t exist”.
Same as above — tab visibility comes from the permission set.
Stale counts or rows after verification.
Use Refresh on the widget or full list; if needed, reload the browser page (full refresh clears any remaining client cache).