
In some cases, users may wish to export the analysis performed in Transfer back to a CSV file for use outside of DataGroomr. The Export Records option is accessible from the dataset’s extended menu.
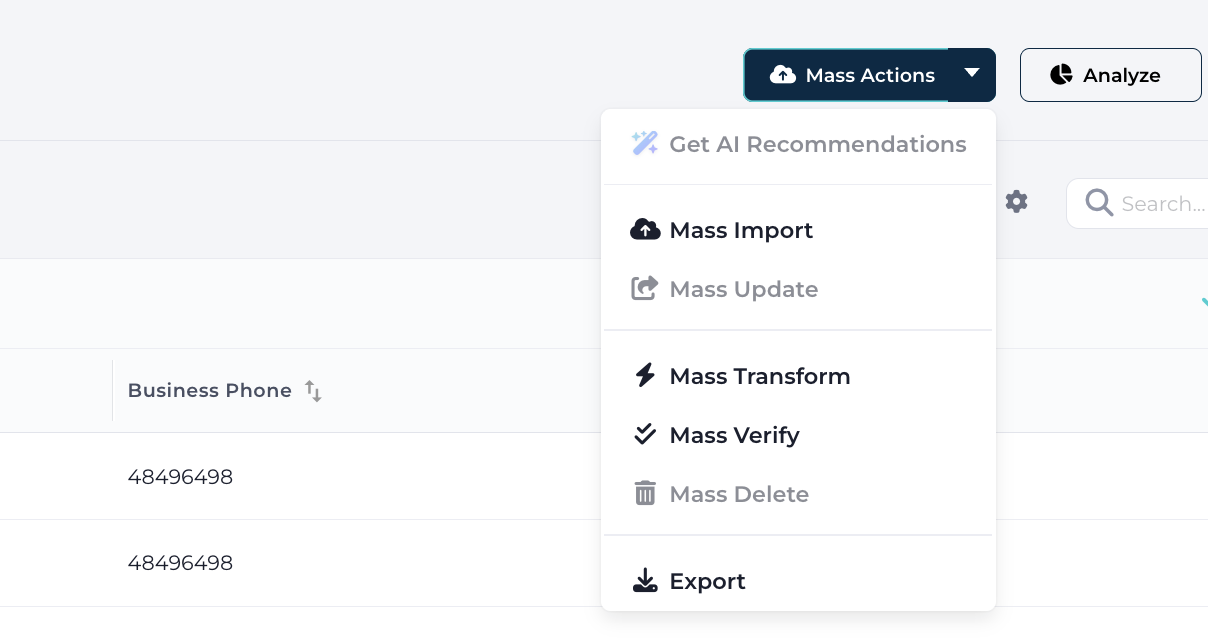
Step 1: Choose Which Records to Export
Clicking Export opens the Export records dialog.
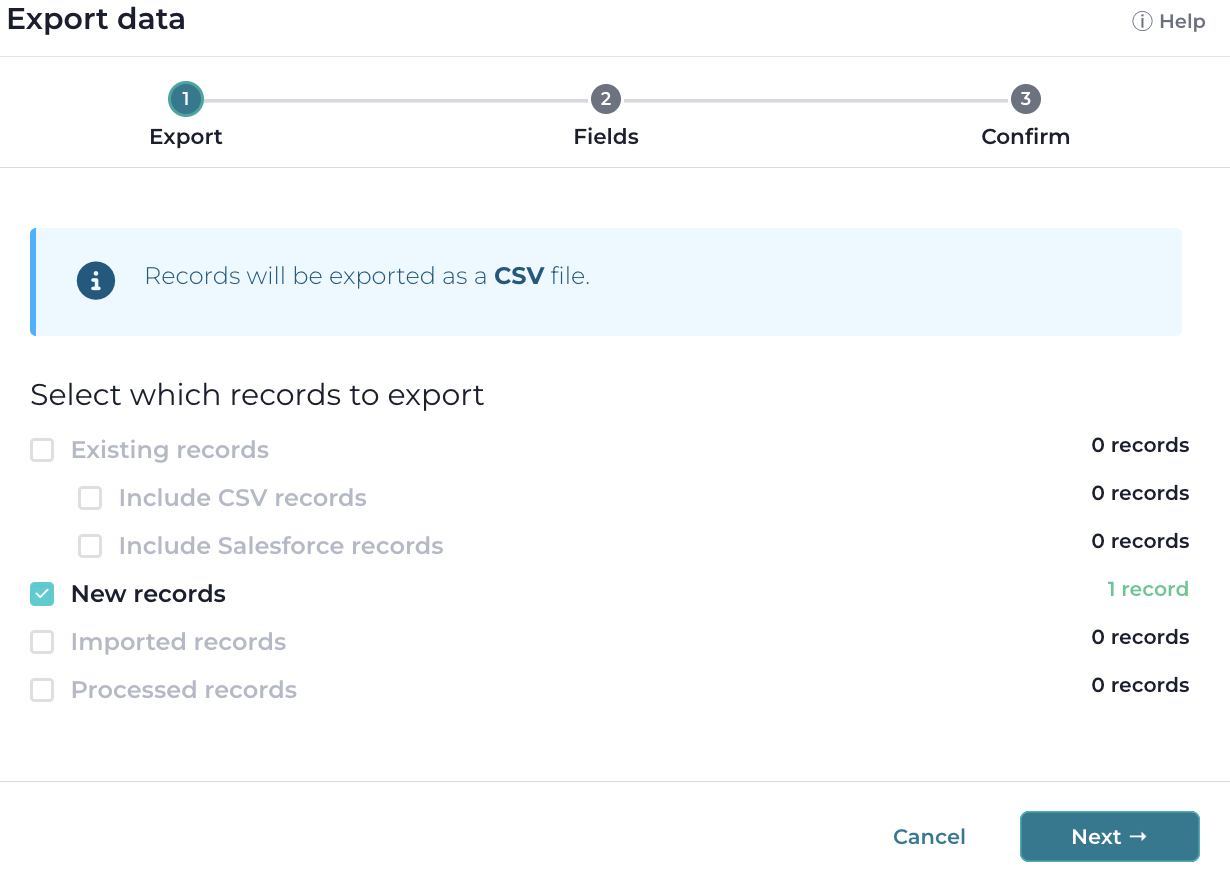
Select which records you want to export — matched, unmatched, or imported — depending on your dataset and needs.
You can include CSV records, Salesforce records, or both.
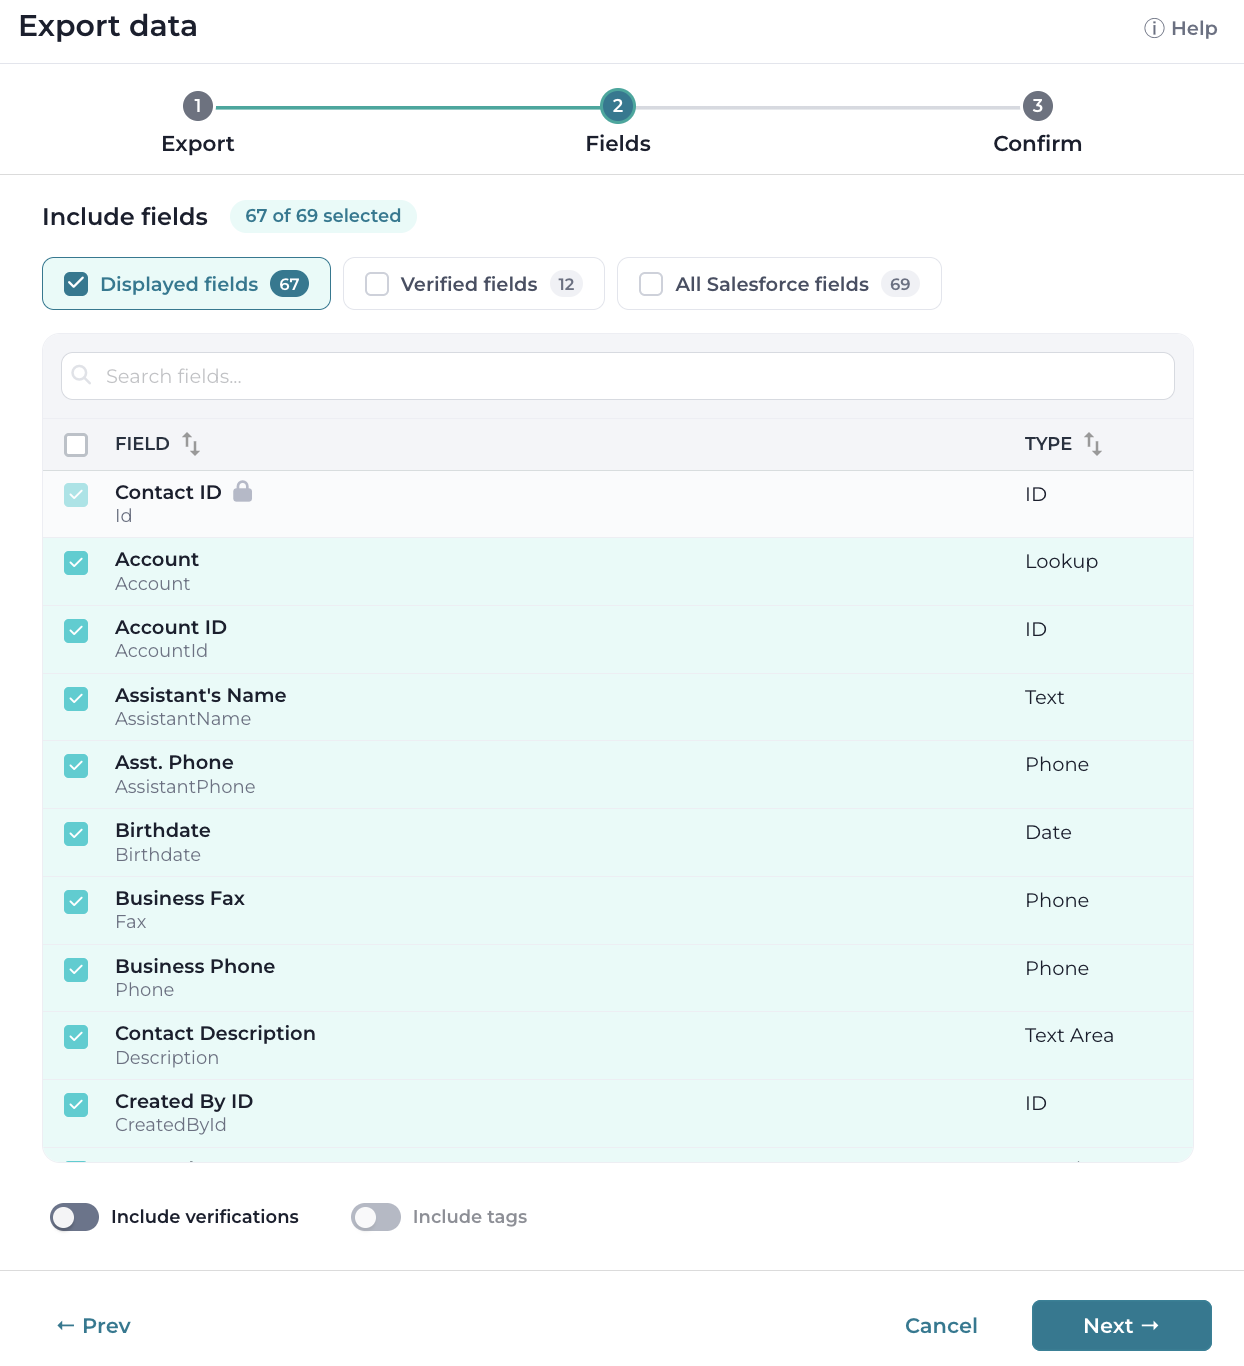
Step 2: Choose Which Fields to Include
Next, choose the fields to include in your export. The presets are combinable toggles rather than exclusive options:
Record IDs only — exports a CSV containing only Salesforce Record IDs.
Displayed fields — exports only the columns currently visible in the dataset view.
All Salesforce fields — exports all available fields for each record.
Below the presets, the complete field list is shown as a searchable, sortable table with per-field checkboxes, so any combination of fields can be selected. Toggling a preset adds or removes its field set, and manual selections update the preset highlighting automatically. The Salesforce record Id is always included and appears as a locked row that cannot be unchecked.
Additional options include:
Include verification data — adds verification results to your export.
Include tags — adds record tags for use in external analysis or reporting.
Step 3: Confirm and Export
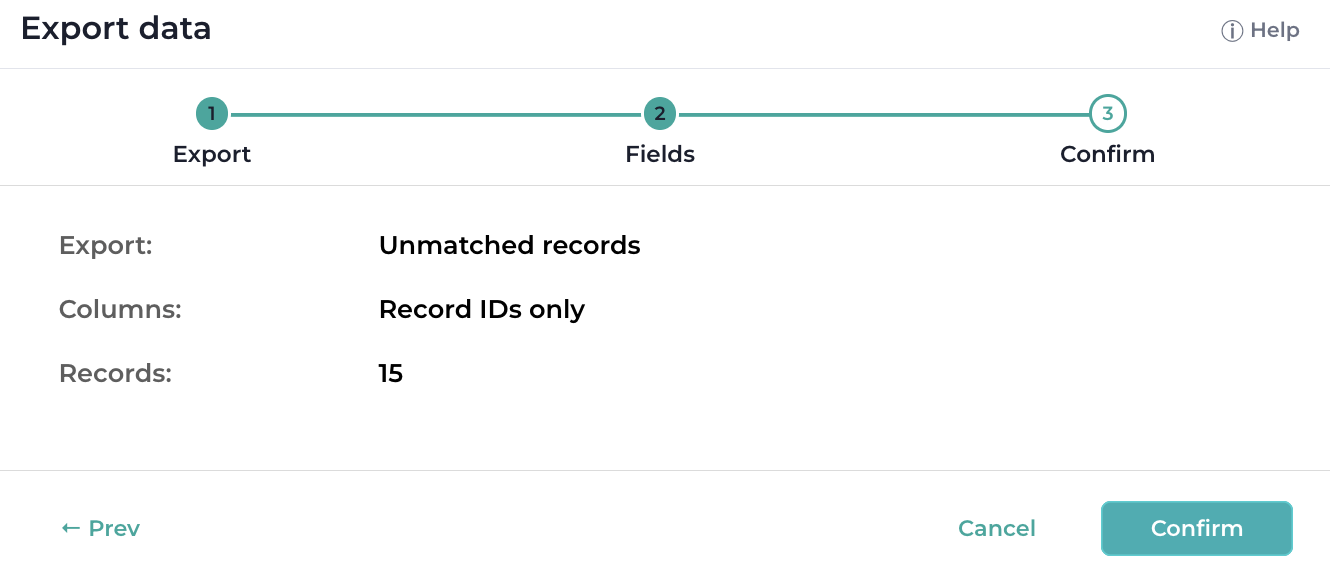
Once you’ve made your selections, click Next, then Confirm to generate the CSV.
Notes
Exports now complete reliably even when reference fields point to objects without a Name field.
The new “IDs Only” export type supports generating lightweight CSVs containing only record IDs.
The Export Tags enhancement allows users to include tag data in CSV exports, enabling external reporting or analysis while preserving dataset classification context.